![]()
It’s time for On the CASE with Ann & Nicole! Your favorite stamping sleuths are back at work continuing our quest: To work through current Stampin’ Up! catalogs breaking down gorgeous samples, step-by-step, just for you! In “case” this is your first “On the CASE” visit, here is the scoop: Twice a month, on the first and third Wednesdays, we will be CASEing a card from one of Stampin’ Up!’s current catalogs. CASE means to Copy and Share with Everyone, and that is exactly what we will be doing. We hope you enjoy the cards we CASE and the free tutorials included in our posts. Are you ready for On the CASE: The CASE of a Magical Day? Let’s get ready to stamp!
On the CASE: The CASE of a Magical Day
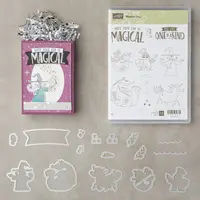
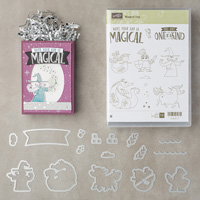
Occasions Catalog – Page 37 (set), Page 36 (card)

I am a pushover for mythical creatures. As a child, I loved stories about unicorns, dragons and mermaids – and they still intrigue me to this very day. That’s probably why I had to have the Magical Day stamp set, with its coordinating Magical Mates Framelits and the gorgeous Myth & Magic papers. While there are those who will probably think the images are rather juvenile, I would like to think there are adults who would appreciate them just as much as I do! After seeing this card in person at OnStage in Salt Lake City this past November, where I snapped this picture, I couldn’t wait to CASE it. Here is my version:

Colors of the Day
Stamps and Papers and Inks…Oh, My!
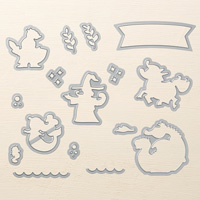
Stamps: Magical Day Bundle, Waterfront
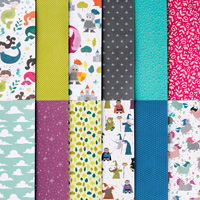
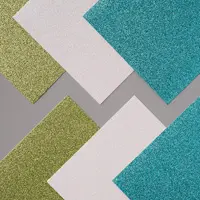
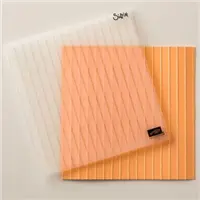
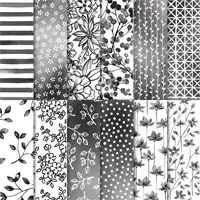
Paper: Pool Party (4-1/4″ x 11″, 4″ x 5-1/4″), Turquoise Myths & Magic Glimmer Paper (2-7/8″ x 2-7/8″), Whisper White (3″ x 3″), Lemon Lime Twist (scraps), Myths & Magic Specialty Designer Series Paper (Mermaid Paper images as shown, Bubbled pattern- 2″ x 4-7/8″)
Ink: Basic Gray Archival, Fresh Fig, Tranquil Tide
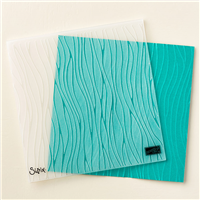
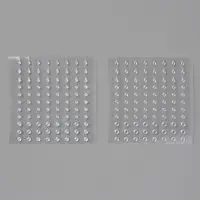
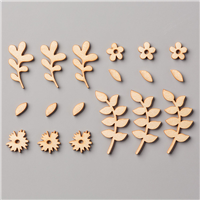
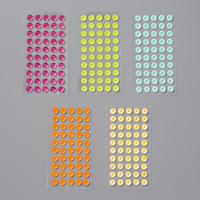
Other: Big Shot, Magical Mates Framelits, Stitched Shapes Framelits, Seaside Textured Impressions Embossing Folder, Banner Triple Punch, Sponge Dauber, Glitter & Clear Epoxy Shapes, Touches of Nature Elements, Clear Wink of Stella, SNAIL Adhesive, Multipurpose Liquid Glue, Stampin’ Dimensionals, Mini Stampin’ Dimensionals
“On the CASE” Notes
Your Step-by-Step Guide
1. Score the Pool Party cardstock at 5-1/2″ to form the card base. Zip the other piece of Pool Party cardstock through the Big Shot with the Seaside Textured Impressions Embossing Folder. Adhere to the card base.

2. Create a banner using the “Bubbles” paper and the Banner Triple Punch. Adhere to the card base.

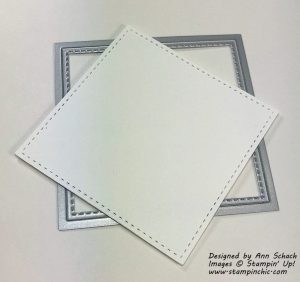
3. Create a Whisper White square from the largest Stitched Shapes Framelit square.
4. Snip out two mermaids from the Myths & Magic Specialty Designer Series Paper.

5. Position the mermaids onto the Whisper White square as shown, but do not adhere yet. Ink the Bubbles image in Basic Gray, and stamp off. Stamp four sets of bubbles.

Pop the square onto Turquoise Glimmer Paper using dimensionals. Tip: Leave the edges clear so you can easily slip in the die cuts and Touches of Nature Elements in a later step. Adhere the mermaids with mini dimensionals., and add to the card base.

6. Die cut the Lemon Lime Twist sea weed. You will need two for the left hand side, and three for the right. Tip: Notice there is a difference in the direction of the two dies.

Using multipurpose liquid glue as your adhesive, slide these into position on the card.
7. Use a sponge dauber and Tranquil Tide ink to color three Touches of Nature wood elements. I used the white side of the element. Repeat to get the desired intensity. Add sparkle with Clear Wink of Stella. (Note: Clear Wink of Stella will lift the color, and you will need to color over it. But, it still sparkles!)

8. Using multipurpose liquid glue, adhere the elements to the card. Tip: Be patient, and allow the ink to dry to avoid getting ink on your fingers and smudging your white square after everything has been so carefully adhered in position. Don’t ask me how I discovered this bit of information.

Notice the sparkle on the Touches of Nature Element on the left – and yes, the small smudge on the right. I hope that whomever will receive this card will overlook it!
9. Ink the sentiment from the Waterfront stamp set in Fresh Fig. Stamp onto Lemon Lime Twist cardstock. Cut to 1-1/4″ x 5/16″ size. Adhere to the card. Tip: If you do not have the Waterfront stamp set, there are several sentiment options to choose from from other sets. Just be sure to select a sentiment which is of a smaller scale. We don’t want to overpower the mermaids. Plus, the illusion that the mermaid is holding the sentiment is adorable, don’t you think?

10. Three Glitter & Clear Epoxy Bubbles complete the look.

How Hard Was It to Crack This CASE
If you like fussy cutting, this card is for you. There are no difficult techniques involved at all – just a lot of steps. It’s a great one to make while watching a movie. Difficulty Level: 2 out of 5

#SUontheCASE
Nicole and I hope our projects today inspire you to try CASEing the catalog, too! We’ll be “on the case”, looking for the hashtag #SUontheCASE on social media (Facebook, Twitter, Instagram, Google+ & Pinterest). If we find one of your projects, we’ll share it, like it, repost it – we’ll do it all!
 Now head on over to Nicole at Pixel Maven’s Retreat to see the CASE file she has been working on. Nicole always writes the BEST tutorials! You will love what she has created for you. It’s awesome!
Would you like to check out the most recent Cold CASE Files? Try these:
On the CASE: A Case of Petal Palette
On the CASE: Beautiful Bouquet Sentiment
On the CASE: Lovely As a Tree
On the CASE: A Season to Sparkle
The CASE of A Brightly Lit Christmas
A CASE of Good Tidings
A CASE of Nature Sings
A CASE of Snowflake Sentiments
A CASE of Gourd Goodness
The CASE of the Sheltering Tree
The CASE of the Beautiful Bouquet
The CASE of the Birthday Blooms
Ready to get On this CASE? If you enjoyed On the CASE: The CASE of a Magical Day, and would like to try your hand at creating your own CASE, the supply list is located below. Clicking on a product takes you right to my store. Be sure to use this month’s Host Code. Online orders over $50 (before tax and shipping) will receive a special little somethin’-somethin’ from me IF you use the Host Code. Don’t forget, a $50 order will also qualify you for a FREE Sale-A-Bration item! If your order is $150 or more, please do not use the Host Code. You will automatically receive the gift from me, as well as your own Host Rewards and Sale-A-Bration items.
 January: QXW3Y2VA
Remember, if you have any questions about the cards I create or the techniques I use, I am only an email away. Until next time – CASE away!