I am always in need of thank you cards. I especially like designing ones specifically for the holiday season, like this Christmas thank you card. This week’s Festive Friday Inspo List provided me with the perfect inspiration to make one.
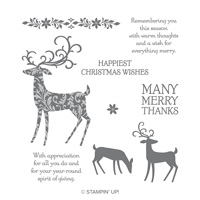
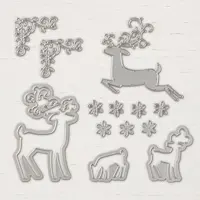
 The Dashing Deer stamp set and coordinating Detailed Deer dies were my choices for today’s card. I selected woodland creatures, gold, ribbon and a thankful theme. Won’t you select at least three items from this week’s Inspo List and play along with us?
 Colors of the Day
 The Stampin’ Schach Design Tips

I feel a little guilty about today’s card. Why? Because it was so easy to make! I wanted to make an elegant card, but there are so many possibilities with this design. I wish I had time to whip up more of these Christmas thank you cards using a variety of designer papers. However, I am flying out to Stampin’ Up!’s On Stage in Las Vegas, and I don’t have the time right now. Hopefully when I get back, I can make a couple more of them. I am thinking gorgeous plaid paper, and perhaps heat emboss the deer…or maybe some fabulous paper from the Christmastime Is Here Specialty Designer Paper collection. Or how about using Brightly Gleaming Specialty Designer Series Paper with copper accents?
 Switch out the colors and papers and have fun with this one! To download the tutorial for today’s Christmas Thank You card, simply click on the button below. For every card which has been posted on my blog this year, there is a free tutorial. To visit the 2019 FREE Tutorial PDF Gallery, CLICK HERE.

For more inspiration, be sure to visit the rest of the Festive Friday Design Team.
![]()
The new Paper Trimmer and Christmastime Is Here Suites are available now. Read about them HERE!


Reduced Prices on My Retired Stamp Sets
I have reduced prices on many of the items on my Retired List. Check it out HERE, and email me at [email protected] if you are interested in purchasing anything.
_____________________________________
November Host Code Information
Ready to order supplies to make your own cards? I would love to be your Demonstrator. Click Here to place an order in my online store.
When checking out, if you apply the Host Code to your online orders of at least $75, but under $150, you’ll get a free gift from me. If your order is over $150, please do not apply the host code – you will be receiving your own host rewards, as well as your gift from me. All orders of $50 or more earn points toward my Loyalty Rewards Program (Details HERE).
November Code: 9ZCHH22E
_______________________________
Membership Has Its Perks … Purchase the Starter Kit Today
- DISCOUNT Time! Once you join, you’ll enjoy a 20 – 25% discount on your favorite Stampin’ Up! items.
- There’s never an obligation to host parties, sell products, or purchase anything else after the kit. You will still enjoy all the benefits and discounts of being a demonstrator through at least April 30, 2020!
- JOIN TODAY! Purchase the starter kit through me and instantly become a member of the Schach Pack Pals. You’ll have access to private Facebook groups, receive newsletters, and will be able to engage with a community of other stampers.
- Questions about joining? Email me at [email protected]. If you are ready to join NOW, CLICK HERE!
As always, if you have any questions about the cards I create or the techniques I use, I am only an email away! Until next time…

- The $99 Starter Kit is the BEST DEAL EVER! Check out the details HERE.
- Join My Paper Pumpkin
- Earn free product with my “Shop with Schach” Loyalty Program.
- Join my Online Host Rewards Club!
- Refer-A-Friend! Free Gifts for both of you! Check it out!
- Check out the Clearance Rack and save!
- See my Retired Sets for Sale.
- Follow me on Pinterest.
- Subscribe to my YouTube Channel.
- To receive my daily blog updates and monthly newsletters, subscription links are in the right sidebar.
- If you are in need of any current catalog, and you do not have a demonstrator, please email me ([email protected]).