Everything is Rosy Product Medley
Limited Release Sales Period: May 1–31, 2019
The absolutely stunning Everything Is Rosy Product Medley will be available for purchase May 1 through May 31, 2019 — or while supplies last. If you love what you see, please don’t wait to order! Item #150059, $80.
The Everything Is Rosy Product Medley includes these exclusive products:
- Everything Is Rosy Photopolymer Stamp Set—18 stamps; suggested blocks: a, b, c (not included)
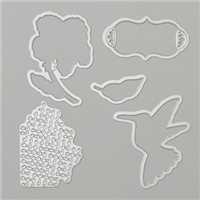
- Everything Is Rosy Dies—10 dies; largest die 2-7/8″ x 1″ (7.3 x 2.5 cm)
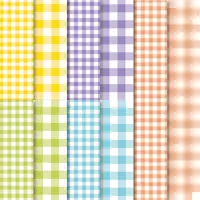
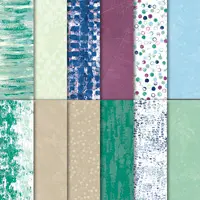
- 6″ x 6″ (15.2 x 15.2 CM) Designer Series Paper Stack—48 sheets; 8 each of 6 double-sided designs
- 6″ x 6″ (15.2 x 15.2 CM) rose gold foil paper—8 sheets
- Printed die cuts—2 sheets
- Rose gold die cuts—4 sheets; 2 each of 2 designs
- Rose gold adhesive backed mirror embellishments—60 embellishments; 1/4″ (6.4 mm)
- Melon Mambo 1/4″ (6.4 mm) Ruched Ribbon—10 yards (9.1 m)
- Night of Navy/Rose Gold 3/8″ (1 cm) Metallic –Edge Ribbon—10 yards (9.1 m)
- Rose Gold Shimmer Paint—1/2 oz. (15 ml)
No order limits apply to the Everything Is Rosy Product Medley. You can stock up and combine with other products. The Everything Is Rosy Product Medley is eligible for Stampin’ Rewards with qualifying orders of $150 of more (total before shipping and tax).
Would you like more bang for your buck? Join! The Everything Is Rosy Product Medley may be added to a $99 Starter Kit. 150059, $80. Click HERE for more information on joining my team!
Check out these gorgeous projects made using the Everything Is Rosy Product Medley!


 Everything Is Rosy Product Medley – Item #150059, $80.
______________________________________________________
For My Current Customers: If you are on my Annual Stampin’ Up! Catalog mailing list, you can expect to receive the new catalog from Stampin’ Up!, which goes live June 4th, beginning mid-May through the end of May. If you have not received your catalog by June 1st, let me know and I will mail one to you pronto!
May Host Code Information
Ready to order the Everything Is Rosy Product Medley? I would love to be your Demonstrator.
When checking out, if you apply the Host Code to your online orders of at least $75, but under $150, you’ll get a free gift from me. If your order is over $150, please do not apply the host code – you will be receiving your own host rewards, as well as your gift from me. All orders of $50 or more earn points toward my Loyalty Rewards Program.
 May Code: CA2V2YHQ

___________________________________________________
Annual Catalog Product Shares – More Information Coming Soon
As always, if you have any questions, don’t hesitate to email me! Until next time…

- The $99 Starter Kit is the BEST DEAL EVER! Check out the details HERE.
- Join My Paper Pumpkin.
- Earn free product with my “Shop with Schach” Loyalty Program.
- Join my Online Host Rewards Club!
- Refer-A-Friend! Free Gifts for both of you! Check it out!
- Check out the Clearance Rack and save!
- See my Retired Sets for Sale.
- Follow me on Pinterest.
- Subscribe to my YouTube Channel.
- To receive my daily blog updates and monthly newsletters, subscription links are in the right sidebar.
- If you are in need of any current catalog, and you do not have a demonstrator, please email me (ann@thestampinschach.com).