Welcome to this week’s On the CASE with Ann & Nicole. Your favorite stamping sleuths are back at work continuing our quest: To work through current Stampin’ Up! catalogs breaking down gorgeous samples, step-by-step, just for you! In “case” this is your first “On the CASE” visit, here is the scoop: Twice a month, on the first and third Wednesdays, we will be CASEing a card from one of Stampin’ Up!’s current catalogs. CASE means to Copy and Share with Everyone, and that is exactly what we will be doing. We hope you enjoy the cards we CASE and the free tutorials included in our posts! Let’s get on to today’s CASE: The CASE of Lovely As a Tree.
On the CASE: Lovely As a Tree
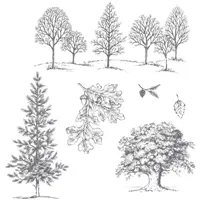
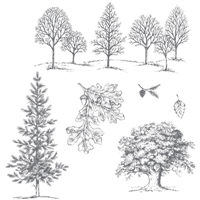
Annual Catalog – Page 137

Lovely As a Tree was one of the sets that I included in my Starter Kit when I first joined Stampin’ Up! as a demonstrator. It has always reminded me of Joyce Kilmer’s simple but beautiful poem, “Trees”:
I think that I shall never see
A poem lovely as a tree.
I couldn’t wait to case this beautiful holiday card created with one of my all-time favorite sets. I hope you will give it a try, too!
Colors of the Day
Stamps and Papers and Inks … Oh, My!
Stamps: Lovely As a Tree, Butterfly Basics
Paper: Pacific Point (2-5/8″ x 4-1/4″), Sahara Sand (4-1/4″ x 11″, 4″ x 5-1/4″), Whisper White (2-3/8″ x 1″)
Ink: Pacific Point, VersaMark
Other: Marina Mist Stampin’ Write Marker, Pacific Point Stampin’ Write Marker, Banner Triple Punch, Big Shot, Pinewood Planks 3-D Dynamic Textured Impressions Embossing Folder, Heat Tool, Silver Stampin’ Emboss Powder, White Stampin’ Emboss Powder, Embossing Buddy, Dazzling Diamonds Stampin’ Glitter, Metallic Foil Doilies, Silver 3/8″ Metallic-Edge Ribbon, Metallics Sequin Assortment, Metallic Enamel Shapes, Fine-Tip Glue Pen, Multipurpose Liquid Glue, Stampin’ Dimensionals
“On the CASE” Notes
Your Step-by-Step Guide

1 Score the Sahara Sand cardstock at 5-1/2″ to form the card base.
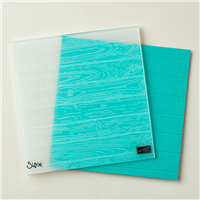
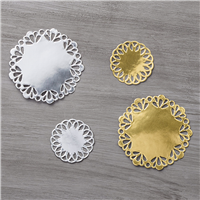
2. Run the 4″ x 5-1/4″ piece of cardstock through the Big Shot with the Pinewood Planks 3-D Dynamic Textured Impressions Embossing Folder. Using SNAIL adhesive, add a silver metallic doily to the embossed panel. Place silver edge metallic ribbon over the panel and the doily. Tie both ends together in a knot. Adhere this layer to the card base.
3. Dust the surface of the Pacific Point cardstock with the Embossing Buddy to avoid speckles. Ink the pine tree image with VersaMark ink. Heat emboss the tree image with White Stampin’ Emboss Powder.

NOTE: After I heat embossed the image in white, it seemed to be too stark. So I added the following step, which you could omit it you like. I have no idea what Stampin’ Up! did, but it tints the tree a beautiful shade of blue, very similar to what is seen with the catalog image.
4. Stamp the tree image with VersaMark. Tint the branches using a Marina Mist Stampin’ Up! Marker, tissue off the excess. Allow this to dry.

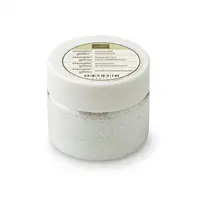
5. Randomly apply multipurpose glue to the branches. Sprinkle with Dazzling Diamonds Stampin’ Glitter and shake off the excess. Use a Fine-Tip Glue Pen to add silver sequins. Top the tree with a silver star. “Pop” into position with Stampin’ Dimensionals.

6. Dust the Whisper White cardstock with the Embossing Buddy. Ink the sentiment with VersaMark and stamp onto the Whisper White cardstock. Use sticky notes to mask everything except the word “wishes”. Heat emboss with Silver Stampin’ Emboss Powder.
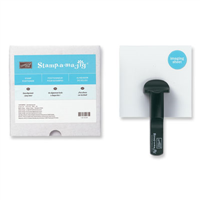
7. Use a Pacific Point Stampin Write Marker to selectively ink the words ” Sending” and Your Way”, and complete the sentiment. Tip: Use a Stamp-a-ma-jig to help you position these words properly above and below the heat embossed “wishes”.

8. Use the Banner Triple Punch to create the “V” on the left end of the sentiment banner.

Adhere to the card base as shown. (I placed two dimensionals on the right end, and a glue dot over the tree.)
How Hard Was It to Crack This CASE
What I thought was going to be a simple card, ended up giving me a few fits! I think my sleuthing skills were impaired for some reason. First, I couldn’t get the embossed panel to look like the sample. I tried adding ink to my embossing folder to make the lines “pop”, but that didn’t quite look right. The panel looked lighter than Sahara Sand, but Very Vanilla was too light. And, it really didn’t look like Smoky Slate. So, I just went with plain Sahara Sand. After all, at this time of the year, we need to keep it simple! Next there was the tree. It has a bluish cast in the picture. First I tried white embossing powder. It was too white. Then I tried silver embossing powder, and it was too dark. Then I tried coloring it with a Marina Mist Stampin’ Write Marker. The color was great, but it just beaded up. So, I tried adding VersaMark and then coloring, and it worked. But you know what, if you want to save time, ust stick with white. And lest I forget, there is the sentiment. Because the word “wishes” is embossed, it does add an extra step. Difficulty Level: 3 out of 5
#SUontheCASE
Nicole and I hope our projects today inspire you to try CASEing the catalog, too! We’ll be “on the case”, looking for the hashtag #SUontheCASE on social media (Facebook, Twitter, Instagram, Google+ & Pinterest). If we find one of your projects, we’ll share it, like it, repost it – we’ll do it all!
 Now head on over to Nicole at Pixel Maven’s Retreat to see the CASE file she has been working on. Nicole always writes the BEST tutorials! You will love what she has created for you.
Would you like to check out the most recent Cold CASE Files? Try these:
On the CASE: A Season to Sparkle
The CASE of A Brightly Lit Christmas
A CASE of Good Tidings
A CASE of Nature Sings
A CASE of Snowflake Sentiments
A CASE of Gourd Goodness
The CASE of the Sheltering Tree
The CASE of the Beautiful Bouquet
The CASE of the Birthday Blooms
Ready to get On this CASE? If you enjoyed On the CASE: Lovely As a Tree, and would like to try your hand at creating your own CASE, the supply list is located below. Clicking on a product takes you right to my store. Be sure to use this month’s Host Code. Online orders over $50 (before tax and shipping) will receive a special little somethin’-somethin’ from me IF you use the Host Code.

And remember, if you have any questions about the cards I create or the techniques I use, I am only an email away. Until next time – CASE away!