Floral Hello Card for PP436

Who says you can’t use plaid Christmas paper for a spring floral “Hello” card? It’s Sunday, and at The Paper Players we are Mad for Plaid!

Floral Hello Card
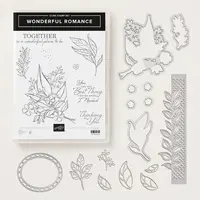
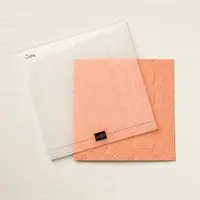
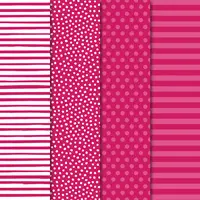
This week, the talented LeAnne is hosting our theme challenge:  Plaids or Checks (as the focus of your project).  While I could have pulled out the oh-so-springy Gingham Gala designer paper, I still had some plaid paper from the Under the Mistletoe collection which I thought would pair nicely with the Wonderful Romance set. I hope you enjoy today’s card!

floral hello card

Colors of the Day

floral hello card

The Stampin’ Schach Design Tips

One of my “go-to” layouts is placing a focal image on a stitched circle, and then adding a banner sentiment. I know you have seen me use this layout many, many times.  It’s an old friend of mine, and I feel quite comfortable with it.  Once again, I found myself gravitating to it.

floral hello card
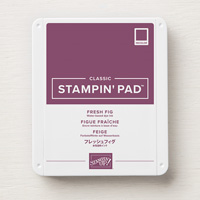
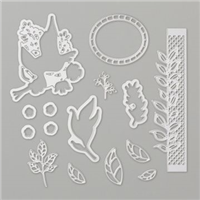
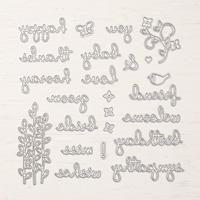
I used the Wonderful Romance bundle, and watercolored the images using an Aqua Painter and inks.  The colors I used are listed in the tutorial.  The brighter foliage was achieved by using Daffodil Delight ink.  The Fresh Fig blossoms have just a touch of Daffodil Delight in their centers, which is hidden by rhinestones. However, you can clearly see that I added a few speckles, which gives them a touch of realism.  Please note:  While the Wonderful Floral framelits dies are not available, the Wonderful Romance stamp set is!  Plus, there are several lovely floral sets with framelits which would work equally well with this layout.  Don’t be afraid to experiment!

floral hello card
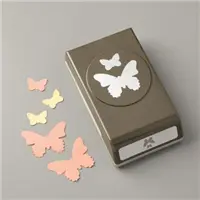
I also broke up the greenery slightly by adding Fresh Fig “sprigs”.   Of course, I couldn’t resist adding a Highland Heather butterfly.  This one reminds me a little of the small purple ones which used to be so prevalent during springtime in Iowa.

floral hello card
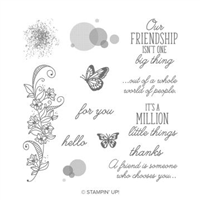
When I have a more complex and “busy” focal point, I like to keep the sentiments “cleaner”.  A simple “hello”, from the Beauty Abounds stamp set,  was all that was needed to complete this card.

For all the details on how to make today’s floral hello  card,  just click on the tutorial button below.  You will receive your own FREE tutorial, which you can either save or print off.  For more inspiration, don’t forget to visit the 2019 PDF Tutorial Gallery.

floral all occasion card

___________________________________________________________

April Host Code Information

Ready to order supplies to make your own floral hello card?  I would love to be your Demonstrator.

Clicking on a product takes you right to my store. When checking out, if you apply the Host Code to your online orders of at least $75, but under $150, you’ll get a free gift from me. If your order is over $150, please do not apply the host code – you will be receiving your own host rewards, as well as your gift from me.  All orders of $50 or more earn points toward my Loyalty Rewards Program.

April Code:  NVMXYQGS

___________________________________________________

Won’t you leave me a comment to let me know what you think of today’s floral hello card? And don’t forget to visit The Paper Players team members for more inspiration. As always, if you ever have a question about the cards I create or the techniques I use, I am only an email away. Until next time…

The Paper Players Design Team

siggy-1

Price: $110.00

Rainbow Card for Earth Day

Looking for a rainbow Earth Day card?  Festive Friday is back with another challenge…and an expanded design team!

Rainbow Earth Day cardThis week we are celebrating Earth Day with a Rainbow twist!  I struggled with rainbow colors a few weeks ago when The Paper Players had their rainbow color challenge.  I think I become too literal, and feel like I have to put ROY G BIV out there in its pure form. At any rate, I seized upon today’s opportunity to create a rainbow Earth Day card using the nifty Layering Alphabet Edgelits! Enjoy!

Rainbow Earth Day CardColors of the Day

rainbow earth day

The Stampin’ Schach Design Tips

I’ll admit it.  I thought the Layering Alphabet Edgelits looked scary.  I had great ideas when I bought them, but they sat unused for months.  As I racked my brain for ideas for this challenge, I knew they would be perfect for creating a rainbow Earth Day card.  I just needed to get over my fear of them.  Stampin’ Up!  had a great video, and as I discovered, they are not scary at all!

After creating the layers, I die cut dotted letters from the various 6″ x  6″ Designer Series Paper color collections, adhering them on top of their cardstock counterparts. The words “happy” and “day” were die cut using the Well Written framelits.

rainbow Earth Day cardI felt this bold card could use a bold flower to offset the letters. The Daisy punch came to the rescue! Three blossoms were punched from Gorgeous Grape cardstock, and layered.  Of course, a bold flower calls for bold bling.

For all the details on how to make today’s rainbow Earth Day card,  just click on the tutorial button below.  You will receive your own FREE step-by-step tutorial, which you can either save or print off.  For more inspiration, don’t forget to visit the 2019 PDF Tutorial Gallery.

rainbow earth day cardThe flower on today’s card reminded me of this picture taken of Muffy’s daughter, Kia. Kia resides in Lynnwood, WA with Brady the Boy.  She is reminding everyone to take time to stop and smell the flowers.

rainbow Earth Day card

____________________________________________

April Host Code Information

Ready to order supplies to create your own rainbow Earth Day card?  I would love to be your Demonstrator.

Clicking on a product takes you right to my store. When checking out, if you apply the Host Code to your online orders of at least $75, but under $150, you’ll get a free gift from me. If your order is over $150, please do not apply the host code – you will be receiving your own host rewards, as well as your gift from me.  All orders of $50 or more earn points toward my Loyalty Rewards Program.

April Code:  NVMXYQGS

___________________________________________

Won’t you leave me a comment to let me know what you think of today’s rainbow Earth Day card? And don’t forget to visit the Festive Friday team members for more inspiration and say “Hi!” to new designers Anne Marie, Miranda, Patricia, and Sharon. As always, if you ever have a question about the cards I create or the techniques I use, I am only an email away. Until next time…
siggy-1

Price: $110.00

Storage by Stampin’ Up! Available April 1st

Storage by Stampin' Up!Whether you have an entire room or a small corner in your home for stamping, your creative space should be tailored to you. Stampin’ Up!’s new product line, Storage by Stampin’ Up!, provides you with modular storage solutions that let you organize—and customize—your space your way!

Storage by Stampin’ Up! is designed to store and showcase your Stampin’ Pads, Stampin’ Ink Refills, Stampin’ Blends, Stampin’ Write Markers, Watercolor Pencils, and other accessories. Here are some other features and benefits of Storage by Stampin’ Up!:

      • Keeps products organized, tidy, visible, and trackable at all times.
      • Ensures that your Stampin’ Pads, Stampin’ Write Markers, and Stampin’ Blends are all stored horizontally, as recommended.
      • Designed to be stylish, durable, compact, stackable, and modular.
      • Blends in naturally with most home decor with its white neutral color.
      • Stacks vertically and can be arranged to fit practically any flat workspace.
      • Easily assembled and disassembled for rearrangement and/or cleaning.

      StorageStorage by Stampin' Up!Storage by Stampin' Up!Storage by Stampin' Up!Storage by Stampin' Up!

      Click HERE to Use the Easy Configuration Chart to Determine What Pieces You Need
      Storage by Stampin' Up!Storage by Stampin’ Up! Q&A

      Will old-design Stampin’ Pads fit in the Ink Pad & Marker Storage Trays?  No. The Ink Pad & Marker Storage Trays are designed to fit our new-design Stampin’ Pads only.

      How high can I stack storage trays?  We stacked up to 50 storage trays without any issues, BUT we would not recommend stacking that high. While our Storage by Stampin’ Up! products are sturdy, the higher you stack them, the less stable they’ll become. Use your discretion when stacking.

      Can I mount my Storage by Stampin’ Up! products on the wall?  No. Our modular storage products are designed to sit on a table (or similar flat surface).

      How should I use the Open Storage Cube?  The Open Storage Cube can be used to hold any miscellaneous items like ribbon, embellishments, and small punches. For more inspiration on ways to use items from our Storage by Stampin’ Up! product line, check out the configuration chart we created.

      Can I mix and match Storage by Stampin’ Up! products?  Yes! Our Storage by Stampin’ Up! products are modular and designed with customization in mind. Take a look at the flyer for more information on the size and dimensions of each item in our new modular storage product line.

      Do I need a Storage Lid for each 5-tray stack?  No. The Storage Lid covers the top of Ink Pad & Marker Storage Trays, Stampin’ Blends Storage Trays, and Open Storage Cubes, so you need only one per storage configuration.

      Are Storage by Stampin’ Up! products free-standing or stacked?  Both. We designed these modular storage products to be free-standing and stackable, so you can customize your crafting space to work best for you.

      How many Stampin’ Ink Refills can I store in the Storage Topper?  You can store up to 20 Stampin’ Ink Refills (or other small items) in the Storage Topper.

      Are ink pads difficult to remove from Ink Pad & Marker Storage Trays?  No. When you insert an ink pad into a storage tray, a small portion of the ink pad will stick out. We designed it this way, so your ink pads will be both secure and easy to access.

      Can I buy individual Ink Pad & Marker Storage Trays and/or Stampin’ Blends Storage Trays?  No. Both of these items include a set of five white plastic trays. Please use the configuration chart to determine how many storage units you need.

      What material do you use to make Storage by Stampin’ Up! products?  Our modular storage products are made with white, acrylonitrile butadiene styrene (ABS) plastic, which is a lightweight and durable material.

      _____________________________________

April Host Code Information

Ready to order Storage by Stampin’ Up!?  I would love to be your Demonstrator.

Clicking on a product takes you right to my store. When checking out, if you apply the Host Code to your online orders of at least $75, but under $150, you’ll get a free gift from me. If your order is over $150, please do not apply the host code – you will be receiving your own host rewards, as well as your gift from me.  All orders of $50 or more earn points toward my Loyalty Rewards Program.

April Code:  NVMXYQGS

___________________________________________

As always, if you have any questions, I am only an email away! Until next time…

siggy-1