I LOVE giving holiday meals that little extra something special, don’t you? If fun mini bags like this one can make even plastic dinnerware look extra special, just think how awesome your holiday finest will look tucked into these cuties! They are a snap to create, and can be decorated all the way from simple to elaborate. Because I only needed to make six for a club gathering, I pulled out all the stops, adding mini sequins, wooden elements, and a “pop” of Berry Burst color. If you are ready to give these a try, just follow my quick and easy instructions.
Colors of the Day
Stamps and Papers and Inks … Oh, My!
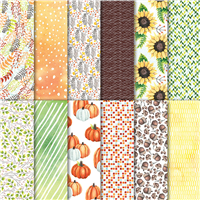
Stamps: Painted Harvest Bundle
Paper: Painted Autumn Designer Series Paper (6-1/8” x 6-1/8”, 3-1/4” x 6”, 2” x 5”, 5/8” x 3-1/2”), Vanilla Cardstock (3/4” x 3-1/2”)
Ink: Early Espresso
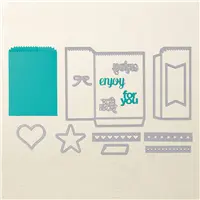
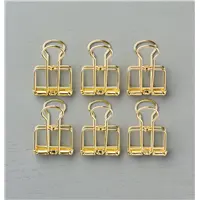
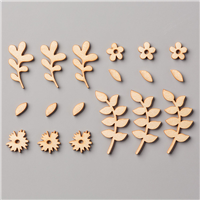
Other: Big Shot, Mini Treat Bag Thinlits, Banner Triple Punch, Paper Snips, Touches of Nature Elements, Gold Binder Clip, Gold Mini Sequin Trim, ¼” Copper Trim, Berry Burst 5/8” Crinkled Seam Binding, Jute Twine, SNAIL Permanent Adhesive, Tear and Tape Adhesive, Mini Glue Dots, Fine Tip Glue Pen
Instructions
- Create the Treat Sack from Designer Series Paper. Assemble with Tear and Tape Adhesive.
- Punch one end of the 2” strip of Designer Paper with the Triple Banner Punch. Position and adhere to the front of the sack, wrapping the excess paper around the back.
- Create a “V” in one end of the 5/8” Designer Paper strip and adhere just the end.
- Stamp the sentiment, create a “V”, and once again adhere just the end.
- Spread out Copper Trim. Attach under the sentiment and smaller strip.
- Embellish with a Library Clip.
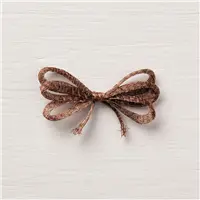
- Create a Berry Burst bow. Add a loop of sequins behind it with glue dots, and adhere.
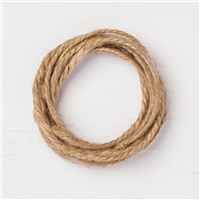
- Knot a snippet of Jute Twine to the Library Clip, and unravel the ends.
And if you would like to thank your guests for their friendship, notice how today’s mini bag coordinates with the Painted Harvest Thank You card from this post.

I hope you enjoyed today’s post. I’ll be back soon with more goodies for you, including a Christmas Card and a Beautiful You card. And always remember – if you ever have a question about the cards I create or the techniques I use, I am only an email away. Until next time…
Coming Soon: Watch for details about sales and specials beginning October 1st, including our annual designer series paper sale and a World Card Making Week sale on select items.
Check out my retired goodies! Purchase $35 worth of retired items from my list, between September 27 – September 30th, and receive 10% off (before postage)! Click HERE!


 I am always in need of thank you cards. In fact, I never have enough to meet my needs. That is why I was happy to design this one using the Painted Harvest stamp set that my husband could help me create. He LOVES embossing with the Big Shot. He’s great at cutting paper. AND he sees straight. It is common knowledge among my stamping friends that I have a knack for stamping and adhering things crookedly. This card is perfect for us to make as a couple. We can both cut. He can emboss and adhere, while I create the label, punch the leaves and add pearls. Just in case you would like to sit down with a friend and create your own version of today’s card, I’ve whipped up a Painted Harvest Thank You card tutorial for you. Enjoy!
 3. Snip the ends of the Designer Paper strips to form a “V”, and adhere to the card base.
 4. Stamp the sentiment in Early Espresso. Punch out with the Pretty Label Punch. Ink the Frond image with Lemon Lime Twist. Stamp off once, then stamp onto the top and bottom edges of the sentiment label. Repeat with Peekaboo Peach, as shown.
 5. Punch an Early Espresso Pretty Label. Cut in half horizontally, and adhere behind the sentiment.
 7. Embellish with Pearls and a Touches of Nature leaf.


 At first glance, I thought this CASE was going to be a piece of cake. There must be a punch or a framelit for the label on which the sentiment is stamped – right? WRONG! Or at least if there was, I couldn’t find it. But don’t despair – I’ll provide the instructions in my step by step tutorial. Now, let’s get on the CASE!


 6. Create the label by using the Tag framelit. Place the black cardstick under the Tag framelit.