![]()
Welcome to this week’s On the CASE with Ann & Nicole, an endeavor undertaken with my friend and stamping buddy, Nicole Watt, of Pixel Maven’s Retreat. In “case” this is your first On the CASE visit, here is the scoop: Twice a month, on the first and third Wednesdays, we will be CASEing a card from one of Stampin’ Up!’s current catalogs. CASE means to Copy and Share with Everyone, and that is exactly what we will be doing. We hope you enjoy the cards we CASE and the free step-by-step tutorials included in our posts! Let’s get on to today’s CASE: A CASE of Nature Sings!
Nature Sings
Page 115 – Annual Catalog 2017
 Ever since I was a little girl, I have loved animals of all types. Deer are no exception. There is something so breathtakingly majestic about a buck standing in a clearing. When I saw the Nature Sings set, I knew I had to own it. It’s not just for Christmas. Think of the gorgeous, masculine birthday cards you can create with this set!

Yikey doodles! This card was a lot of work. But don’t despair! It will be easier now that I have cracked the CASE. I’ll provide the instructions in my step by step tutorial. Let’s get on the CASE!
Colors of the Day
Stamps and Papers and Inks…Oh, My!
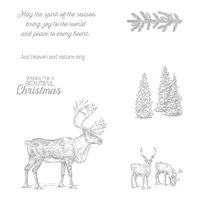
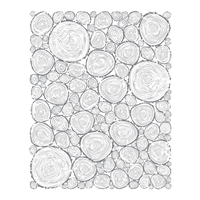
Stamps: Nature Sings, Tree Rings
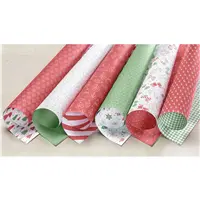
Paper: Basic Black Cardstock (5-1/2″ x 1″), Crumb Cake Cardstock (5-1/2″ x 8-1/2″, 3-1/2″ x 3-1/2″), Vellum Cardstock (3-1/2″ x 3-1/2″), Whisper White Cardstock (3/4″ x 3″, scraps), Watercolor Paper (3-1/2″ x 3-1/2″), Be Merry Designer Series Paper (3-1/2″ x 3-1/2″ of green, scrap of Cherry Cobbler)
Inks: Basic Black Archival, Crumb Cake
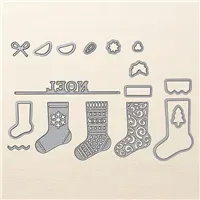
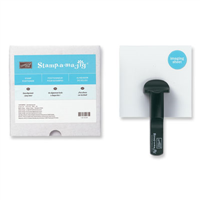
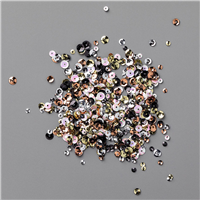
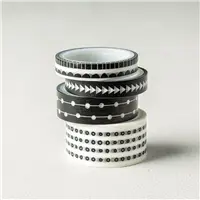
Other: Big Shot, Layering Circles Framelits, Christmas Stockings Thinlits, Stamp-a-ma-jig, Paper Snips, Aqua Painters, Pick a Pattern Washi Tape, Metallics Sequin Assortment, 5/8″ Burlap Ribbon, Stampin’ Dimensionals, Fine-Tip Glue Pen, SNAIL Adhesive
“On the CASE” Notes
Your Step-by-Step Guide
1. Score the Crumb Cake cardstock at 4-1/4″ to create the card base.
2. Use the largest Layering Circles framelit to die cut a Garden Green circle from Be Merry Designer Series Paper. Note: You will use this framelit to cut all the circles for this card.

3. Ink the Tree Rings background stamp in Basic Black ink and stamp onto Crumb Cake cardstock. Die cut the circle. Tip: With large background stamps, I ink the stamp and place the paper on top of the stamp. I then roll over it with a brayer. Save ink and paper by cutting the circle first, then inking up just the section of the image you want to use.

4. Using a pencil and the vellum cardstock, trace lightly around the circle framelit. Ink the “May the spirit” sentiment with Basic Black ink and stamp repeatedly until the circle is filled. Use a Stamp-a-ma-jig to help line up the image. When the traced circle is filled, die cut it out with the circle framelit. Tip: Be careful not to smear the ink. If you wish, you can use a Heat Tool on low to dry it.

5. Stamp the deer image in Basic Black ink onto water color paper. Use the circle framelit to cut it out. Tip: The Magnetic Platform keeps the circle exactly where you want it!

6. Wash the surface, as shown, using an Aqua Painter and Crumb Cake ink. Gently squeeze the closed ink pad in order to pool the ink in the lid. Tip: If things get too watery, dab away the excess water with a paper towel.


Add a few spatters simply by tapping the Aqua Painter over a finger.

Complete the circle by inking the trees image with Basic Black and stamping just a partial tree as shown.
6. Ink the trees again in Basic Black, and stamp onto Whisper White cardstock. Snip out the trees on the left and on the right of the image.


7. Stamp the trees in Basic Black directly onto the left side of the card base as shown.

8. Stamp the Beautiful Christmas sentiment onto Whisper White cardstock. Snip a “V” in the end. Adhere this to a snippet of Cherry Cobbler Be Merry DSP.

9. Using the Big Shot and the NOEL thinlit, die cut NOEL from Basic Black cardstock.

10. Take approximately 5-1/2″ of 5/8″ Burlap Ribbon and unravel the strands. Set aside to use later.

11. Assemble the card as follows:
a) Adhere the Garden Green and vellum circles to the card base.
b) Add the snippets of washi tape.
c) Adhere the Tree Ring circle.
d) Position and adhere the sentiment banner.
e) Tape the ravelings to the back of the deer circle. “Pop” the deer up on dimensionals, and adhere to the card.
f) Adhere one snipped out tree directly onto the deer circle. Use dimensionals to adhere the other tree beside the circle.
g) Use the Fine-tip Glue Pen to glue “NOEL” in place.
h) Embellish with gold sequins.

How Hard Was It to Crack this CASE
While none of the individual steps in creating this card are difficult on their own, they are time consuming. There is a level of precision required when stamping the vellum circle. If I were to make this card again, instead of the vellum, I would substitute either the Merry Music Designer Series Paper, available in the Holiday Catalog, or stamp my own using the Sheet Music background stamp. Another time saver – I would use a selection from the Wood Textures Designer Series Paper Stack instead of using the Tree Ring stamp. Difficulty Level: 4 out of 5 as created
#SUontheCASE
Nicole and I hope our projects today inspire you to try CASE-ing the catalog, too! We’ll be “on the case”, looking for the hashtag #SUontheCASE on social media (Facebook, Twitter, Instagram, Google+ & Pinterest). If we find one of your projects, we’ll share it, like it, repost it – we’ll do it all!
 Now head on over to Nicole, the Pixel Maven, to see the CASE file she has been working on from the Annual Catalog. It’s another holiday card. It is amazing. Nicole always writes the BEST tutorials! You will love what she has created for you! And remember, if you have any questions about the cards I create or the techniques I use, I am only an email away. Until next time – CASE away!
Would you like to check out the most recent Cold CASE Files? Try these:
A CASE of Snowflake Sentiments
A CASE of Gourd Goodness
The CASE of the Sheltering Tree
The CASE of the Beautiful Bouquet
The CASE of the Birthday Blooms
Ready to get On this CASE? If you would like to try your hand at creating today’s card, the supply list is located below. Clicking on a product takes you right to my store.
Ready to check out Stampin’ Up!’s latest specials and get my October Host Code? Click HERE to visit the latest Let the Sales Begin post.
Looking for a Retired Stampin’ Up! stamp set? Check out my list. Over 100 sets available.


 It’s time for another round of inspiration from

 #1 and #2 were masked, while #3 and #4 were stamped. #3 and #4 were masked while #5 as stamped. All images were stamped in Basic Black Archival ink and colored using Aqua Painters and inks.
 Powder Pink graces the legs and neck, while Smoky Slate and Real Red were used for dresses and umbrellas. Soft Sky was used to outline everything.