![]()
Woo hoo! Nicole and I are back with another On the CASE. I am working my way through Stampin’ Up!® catalogs, breaking down samples step-by-step, in order to provide you with free tutorials so you can CASE your own. Nicole is using her investigative skills to solve CASES throughout the crafting universe. Let the fun begin!
Today I am CASEing an adorable card from the Occasions Catalog. This card uses the Wonderful Romance bundle. I hope you enjoy today’s small romantic card.
Small Romantic Card
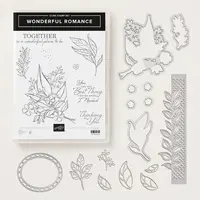
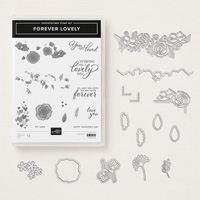
Wonderful Romance Bundle
2019 Occasions Catalog Page 10
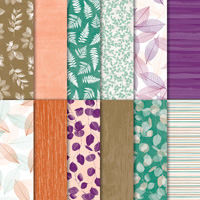
 I love this small romantic card. This floral vellum, from the Floral Romance Specialty Designer Series Paper collection, is gorgeous. For a non-standard size card (this one measures 2-1/2″ x 4-1/2″ when folded), there are lots of details to set this card apart.

Colors of the Day
 Stamps and Papers and Inks…Oh, My!

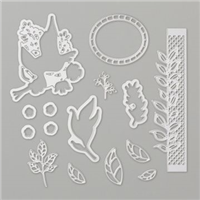
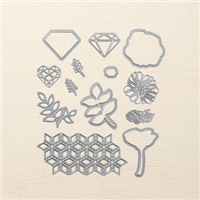
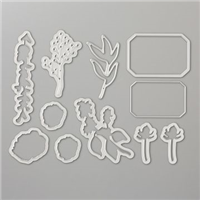
Stamps: Wonderful Romance Bundle (Includes Wonderful Floral Framelits Dies)
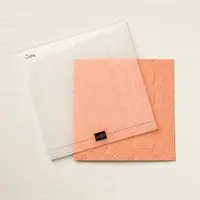
Paper: Mossy Meadow cardstock (2-1/2″ x 9″); Pear Pizzazz cardstock (2-3/8″ x 4-3/8″, 4″ x 3″); Petal Pink cardstock (scraps); Sahara Sand cardstock (4″ x 3″), Whisper White cardstock (2″ x 1″), (Floral Romance Specialty Designer Series Paper (Floral Vellum – 2-1/4″ x 4-1/8″)
Inks: Pear Pizzazz, Petal Pink, Whisper White Craft Stampin’ Pad, Crumb Cake Stampin’ Write Marker®
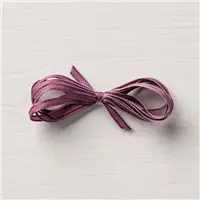
Other: Big Shot, Lace Dynamic Textured Impressions Embossing Folder, Wonderful Romance Framelits (included in bundle), Pearl Basic Jewels, Fresh Fig 1/8″ Sheer Ribbon, SNAIL, Stampin’ Dimensionals, Mini Glue Dots
“On the CASE” Notes
Your Step-by-Step Guide
1. Score the Mossy Meadow cardstock at 4-1/2″ to form the card base. Crease with a bone folder.
2. Adhere the vellum to the Pear Pizzazz cardstock. Add to the card base.
 3. Emboss the Sahara Sand cardstock using the Lace embossing folder. Rub the white craft ink pad over the surface to add color. Allow the ink to dry.
 Punch out using the 2-1/4″ circle punch. Adhere to the card with dimensionals.
 4. Selectively ink the words of the sentiment using a Crumb Cake Stampin’ Write Marker®. Stamp onto 2″ x 1″ Whisper White cardstock. Snip a “V” in the left end. Adhere to the embossed circle. (Note: Stampin’ Up! used a Sahara Sand Stampin’ Write Marker®, but I felt mine was too light, so I opted to use Crumb Cake.)
 5. Ink both styles of leafy fronds in Pear Pizzazz and stamp onto Pear Pizzazz cardstock. Die cut using the appropriate Wonderful Romance framelit.
 Adhere to the card. I used SNAIL.
 6. Ink the small blossom in Petal Pink and stamp onto Petal Pink cardstock. Repeat to create a total of three. Die cut out using the framelits.
 7. Adhere to the card using glue dots. Accent the center of each with a pearl. Add a small Fresh Fig bow. (Note: Stampin’ Up!’s sample uses a bow created from the new Petal Pink and White 5/8″ Variegated Ribbon which had been split. Since I found this a little difficult to work with and create a pretty bow, I finally gave up and used Fresh Fig ribbon.)
 Isn’t this such a pretty little card? I love it. This could easily be translated into a 4-1/4″ x 5-1/2″ size, as you shall see tomorrow!
If you would like to print off or save a step-by-step tutorial for today’s card, just click on the button below. (I have not included all the pictures which you see above in order to save you ink! )
 How Hard Was It to Crack This CASE
This small romantic card is filled with beautiful details. The stamping is simple, and the die cutting is easy. Just remember to allow the craft ink to dry before punching out the embossed circle. Difficulty Level: 3 out of 5, because of the time involved and the number of steps.
 Now head on over to Nicole at Pixel Maven’s Retreat to see the CASE file she has been working on. Nicole always writes the BEST tutorials!
Did you miss the last On the CASE project? Check it out HERE.
Would you like to create your own small romantic card? If you enjoyed today’s card, and would like to create your own small romantic card, the supply list is located below. Clicking on a product takes you right to my store. Be sure to use this month’s Host Code. Online orders over $75 (before tax and shipping) will receive a little gift from me IF you use the Host Code, plus you will be eligible for Sale-A-Bration rewards. Click HERE to see your SAB choices. If your order is $150 or more, please do not use the Host Code. You will automatically receive the gift from me, as well as your own Host and Sale-A-Bration Rewards.

January: 49SAJY3P
Information about the Stampin’ Schach Online Host Club is now available! Read all about it HERE!
As always, if you have any questions about the cards I create or the techniques I use, I am only an email away! Until next time…
- The $99 Starter Kit is the BEST DEAL EVER! Check out the details HERE.
- Join My Paper Pumpkin.
- Earn free product with my “Shop with Schach” Loyalty Program.
- Join my online Host Club. Read All About It!
- Check out the Clearance Rack and save!
- See my Retired Sets for Sale.
- Follow me on Pinterest.
- Subscribe to my YouTube Channel.
- To receive my daily blog updates and monthly newsletters, subscription links are in the right sidebar.
- If you are in need of a 2019 Occasions Catalog, and you do not have a demonstrator, please email me (ann@thestampinschach.com).