


![]()
Nicole and I are back for the final On the CASE of 2018. As you know, in this series, we work through current Stampin’ Up!® catalogs, breaking down gorgeous samples step-by-step, in order to provide you with free tutorials so you can CASE your own. This week, I am back in the Annual Catalog with an adorable cat note card made with the Better Together stamp set.
Cat Note Card
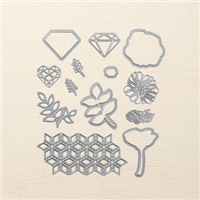
Better Together Stamp Set
Annual Catalog Page 16
 I loved this card the moment I saw it. However, I was afraid to tackle it. After making so many holiday cards in shades of red and green, this card was like a breath of spring. Since I needed a “note” card, I decided to give it a try. I hope you enjoy this cute cat note card CASE!

Colors of the Day

Stamps and Papers and Inks…Oh, My!
Stamps: Better Together
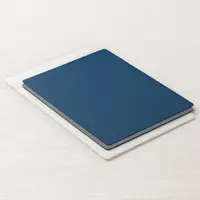
Paper: Pear Pizzazz Cardstock (4-1/4″‘ x 11″, 4″ x 5-1/4″, 2″ x 4-1/4″); Old Olive Cardstock (3-5/8″ x 3-3/4″; Shimmery White (2-7/8″ x 3-1/4″, 2″ x 2-1/2″), Sahara Sand (2-7/8″ x 1/2″)
Ink: Crumb Cake, Merry Merlot, Pear Pizzazz, Versamark
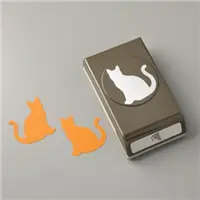
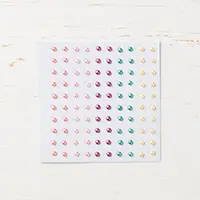
Other: Big Shot, Eclectic Layer Thinlits, Embossing Mat, Cat Punch, Heat Tool, Gold Stampin’ Emboss Powder, Paper Snips, Sponge Dauber, Aqua Painter, Share What You Love Artisan Pearls, Very Vanilla Polka Dot Tulle, SNAIL, Stampin’ Dimensionals, Paint Brush
“On the CASE” Notes
Your Step-by-Step Guide
1. Score the Pear Pizzazz cardstock at 5-1/2″ to form the card base. Crease with a bone folder.
2. Emboss the leaf image in the position shown on the 4″ x 5-1/4″ piece of Pear Pizzazz. It is approximately 1-3/8″ from the top edge, and 7/8″ from the left side. To emboss using the thinlit, prepare the Big Shot sandwich as follows: Big Shot platform, acrylic cutting plate, die (cutting edge up), paper, thin blue silicon rubber mat, white impressions pad. Note: The blue silicon mat and white impressions pad are part of the Big Shot Embossing Mats collection (Item #146327).

3. Using an old brush, sweep Versamark ink across the surface of the card as shown. Heat emboss with Gold Stampin’ Emboss Powder.

4. Use the decorative “Star Lattice” thinlit to create the cutout. Then use paper snips to snip around the edges. Adhere to the card base.

5. Adhere a snippet of Very Vanilla Polka Dot Tulle ribbon approximately 1-1/8″ from the bottom. Snip a “V” in the left end. Wrap the right end behind panel. Adhere the panel to the card base.
6. Die cut three leafy stems from Old Olive cardstock and adhere them to the card base.

7. Punch out a cat from Shimmery White cardstock.

8. Shade the edges by using Crumb Cake ink and a Sponge Dauber. Adhere to the card base with dimensionals.

9. Ink the flower in Merry Merlot. Stamp onto Shimmery White cardstock. Use an Aqua Painter to “bleed” the color of the petals. Stamp a second flower in Pear Pizzazz, and bleed the leaves. Snip out the blossom, and adhere in place on the Pear Pizzazz flower so that the leaves peek out. Adhere the flower to the card base, and accent with three Rich Razzleberry Artisan Pearls.

10. Ink the sentiment in Merry Merlot and stamp onto the Sahara Sand cardstock. Snip a “V” in the left end. Adhere to the card base.

11. Sit back and enjoy your work!

How Hard Was It to Crack This CASE
Today’s card was time intensive with a ton of techniques. If you have never used a thinlit to emboss, it opens up a whole new world of possibilities for you. The embossing mats are a great investment. The paper snipping around the “star lattice” is easy, since it is just straight cuts, and the flower is such a small image, so fussy cutting it out is not a problem. When distressing the cat, be sure to use a light touch, and remove most of the color from the sponge dauber before using it. Difficulty Level: 4 out of 5, but the end result is a lovely card. And of course, because I have worked out the steps for you, I’m sure it will take you less time to create it than it did me!
 Now head on over to Nicole at Pixel Maven’s Retreat to see the CASE file she has been working on. Nicole always writes the BEST tutorials! I am in awe of her skills.
Did you miss the last On the CASE project? Check it out HERE.
Ready to get on this CASE? If you enjoyed today’s cat note card, and would like to try your hand at creating your own CASE, the supply list is located below. Clicking on a product takes you right to my store. Be sure to use this month’s Host Code. Online orders over $75 (before tax and shipping) will receive a special little somethin’-somethin’ from me IF you use the Host Code. If your order is $150 or more, please do not use the Host Code. You will automatically receive the gift from me, as well as your own Host Rewards.

December: U4S62766
As always, if you have any questions about the cards I create, or the techniques I use, I am only an email away! Until next time…

- The $99 Starter Kit is the BEST DEAL EVER! Check out the details HERE.
- Join My Paper Pumpkin.
- Earn free product with my “Shop with Schach” Loyalty Program.
- Check out the Clearance Rack and save!
- See my Retired Sets for Sale. 25 % off through December 31st.
- Follow me on Pinterest.
- Subscribe to my YouTube Channel.
- To receive my daily blog updates and monthly newsletters, subscription links are in the right sidebar.
- If you are in need of an upcoming 2019 Occasions Catalog, and you do not have a demonstrator, please email me ([email protected]).


Wow! I love this card! Thank you for sharing your tutorial. I will be trying the embossing technique using a die.
Mary from NH
I love the card, Ann! Very nice combination of designs and love the kitty sitting on top. I love that one die you used…..wish it were available separately. 🙂
Lovely card Ann and your clearly written tutorial revealed the mystery of how the gold was applied to the card. . . . couldn’t figure it out from the catalog picture.
Beautiful card Ann and the step by step is most helpful with this card. And what a surprise to see a cat card from you!