


![]()
Nicole and I are back On the CASE. Our mission: To work through current Stampin’ Up! catalogs, breaking down gorgeous samples step-by-step, just for you! CASE means to Copy and Share with Everyone, and that is exactly what we do. We hope you enjoy the cards we CASE and the free tutorials included in our posts. I hope you enjoy today’s CASE of Tropical Chic’s cute summer thank you card.
Tropical Chic
Summer Thank You Card
Annual Catalog Page 121

The Tropical Chic stamp set is perfect for creating summer cards. The leafy foliage replicates the lush feel of the the tropics, especially when stamped in shades of Granny Apple Green and Shaded Spruce. I hope you enjoy today’s CASE.

Colors of the Day
Stamps and Papers and Inks … Oh, My!
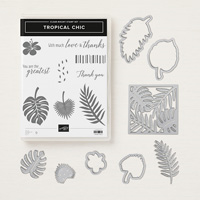
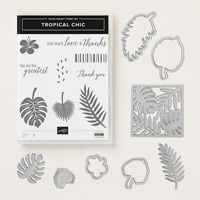
Stamps: Tropical Chic (Bundle includes Tropical Thinlits Dies)
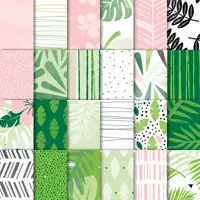
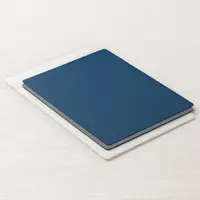
Paper: Blushing Bride Cardstock (4-1/4″ x 11″), Shaded Spruce Cardstock (4-1/2″ x 3″), Soft Sea Foam (3-1/2″ x 3-3/4″), Whisper White Cardstock (scraps for stamping leaves), Tropical Escapes Designer Series Paper (3-3/4″ x 5″, 3/4″ x 4-1/2″)
Ink: Blushing Bride, Granny Apple Green, Shaded Spruce, Tuxedo Black Memento
Other: Big Shot, Tropical Thinlits dies, Stitched Shapes Framelits, Embossing Mat, Tropical Elements, 5/8″ Burlap Ribbon, SNAIL Adhesive, Stampin’ Dimensionals
“On the CASE” Notes
Your Step-by-Step Guide
1. Score the Blushing Bride cardstock at 5-1/2″ to form the card base.
2. Add the Blushing Bride striped designer paper, offsetting it to the left.

3. Emboss the Soft Sea Foam cardstock using the square foliage thinlit. Create the Bigshot sandwich as follows: platform, acrylic cutting pad, thinlit placed cutting side up, cardstock, blue silicon pad, impressions pad.

The image will be embossed, not cut out.

4. Create the stitching around the foliage by using the largest stitched shapes square framelit. Use the same “sandwich” as in step 3. Trim to 3-1/2″ x 3-3/4″ and adhere to the card with dimensionals.

Hint: As you can see in the picture, the framelit slipped a wee bit when running it through the Big Shot. I would suggest holding the framelit in place with tape.
5. Ink the fronds in Shaded Spruce, and stamp twice without re-inking. Cut out with the appropriate framelit.

6. Ink the leaves in Granny Apple Green, and stamp three times without re-inking. Cut out the two lightest with the appropriate framelit.

7. Ink the fan shaped leaf in Shaded Spruce. Stamp twice without re-inking. Die cut out the lightest with the appropriate framelit.

8. Ink the flower in Blushing Bride. Use a Blender Pen to remove color from the anthers. Stamp onto Whisper White cardstock. Use a Daffodil Delight Stampin’ Write Marker to create two yellow anthers. Cut out with the correct framelit. Repeat to form a second flower.

9. Cut out two Shaded Spruce leafy fronds using the framelit pictured.

10. Create the outlined leaf cutout from Shaded Spruce cardstock.

11. Adhere all of the foliage and flowers to the card base as shown.
12. Stamp the sentiment in Tuxedo Black Memento Ink onto designer paper. Add to the card using dimensionals.

13. Pull a fiber from a snippet of 5/8″ Burlap Ribbon and use it to tie a bow through a Tropical Element button. Adhere to the sentiment.

14. Send to a friend!

How Hard Was It to Crack This CASE
Today’s card is not for the faint hearted. There is a lot of stamping and die cutting. In addition, I found it a little tricky to position the Stitched Square framelit around the foliage. Difficulty Level: 4 out of 5
#SUontheCASE
Nicole and I hope our projects today inspire you to try CASEing the catalog, too! We’ll be “on the case”, looking for the hashtag #SUontheCASE on social media (Facebook, Twitter, Instagram, Google+ & Pinterest). If we find one of your projects, we’ll share it, like it, repost it – we’ll do it all! Now head on over to Nicole at Pixel Maven’s Retreat to see the CASE file she has been working on. Nicole always writes the BEST tutorials! What she has CASED is fabulous…and you will be delighted!
Ready to get On this CASE? If you enjoyed today’s card, and would like to try your hand at creating your own CASE, the supply list is located below. Clicking on a product takes you right to my store. Be sure to use this month’s Host Code. Online orders over $50 (before tax and shipping) will receive a special little somethin’-somethin’ from me IF you use the Host Code. If your order is $150 or more, please do not use the Host Code. You will automatically receive the gift from me, as well as your own Host Rewards.

JUNE: K2QQUSBK
As always, if you have any questions about the cards I create or the techniques I use, I am only an email away. Until next time…


Love the elegance and simplicity of this card. And thank you for showing me how to use thinlit dies as an embossing folder. Many blessings.
Pingback: Stamp Review Crew: Tropical Chic Edition - The Stampin' Schach
Wow – gorgeous work as always! Thanks for sharing the breakdown and how-to. Very generous of you!
Ann this is just plain GORGEOUSNESS!!! Love everything about it. Hugs
A lot of work, but fabulous!
Your card is gorgeous! The colors, stamps and dies are fantastic! Smile BIG! 🙂
I didn’t care for the paper that much but I really like your card. A lot of steps but it is definitely a wow card. Love all the layers of leaves. Did you add any pearls?
Lot of work to do this card but looking at your end results it is worth the effort. These colors are yummy! Thanks so much for the step by step directions. I will give this one a go and see if I can end up with a nice card.
Thanks for “cracking” this case, Ann. It is a bit difficult, but you make it look easy!
This card is over the top beautiful. Absolutely love it.
Pingback: On the CASE: Graceful Glass | Pixel Mavens' Retreat