


![]()
Welcome to this week’s On the CASE with Ann & Nicole, an endeavor undertaken with my friend and stamping buddy, Nicole Watt, of Pixel Maven’s Retreat. In “case” this is your first On the CASE visit, here is the scoop: Twice a month, on the first and third Wednesdays, we will be CASEing a card from one of Stampin’ Up!’s current catalogs. CASE means to Copy and Share with Everyone, and that is exactly what we will be doing. We hope you enjoy the cards we CASE and the free step-by-step tutorials! Let’s get on to today’s CASE: A CASE of Snowflake Sentiments!
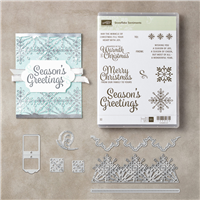
Snowflake Sentiments
Page 35 – Holiday Catalog 2017

Let’s face it. I’m mad about plaid! I’m smartin’ for tartan! I am a wreck for check! And since ah hae a wee bit ay Scottish bluid coursing through my veins, this piece of plaid perfection screamed out, “CASE me!”
 At first glance, I thought this CASE was going to be a piece of cake. There must be a punch or a framelit for the label on which the sentiment is stamped – right? WRONG! Or at least if there was, I couldn’t find it. But don’t despair – I’ll provide the instructions in my step by step tutorial. Now, let’s get on the CASE!
Colors of the Day
Stamps and Papers and Inks…Oh, My!
Stamps: Snowflake Sentiments
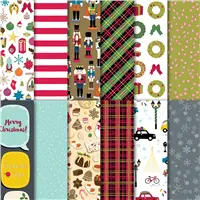
Paper: Basic Black Cardstock (3″ x 1-1/16″), Garden Green Cardstock (5-1/2″ x 8-1/2″), Old Olive Cardstock (3″ x 3″), Real Red Cardstock (2″ x 4″), Whisper White Cardstock (6-1/4″ x 2-1/4″, 2 pieces: 3/4″ x 4-1/4″ ), Christmas Around the World Designer Series Paper – Green Plaid pattern (4″ x 4-1/4″)
Inks: Basic Black Archival, Real Red, VersaMark
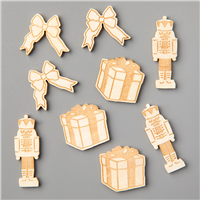
Other: Big Shot, Swirly Snowflakes Thinlits Dies, Stitched Shapes Framelits, Banner Triple Punch, Heat Tool, White Stampin’ Emboss Powder, Paper Snips, Stampin’ Dimensionals, Fine-Tip Glue Pen, SNAIL Adhesive, Christmas Around the World Embellishments
“On the CASE” Notes
Your Step-by-Step Guide
1. Score the Garden Green cardstock at 4-1/4″ to create the card base.
2. Run the two pieces of 3/4″ x 4-1/4″Whisper White cardstock through the Big Shot with the “Holes” framelit. Adhere the resulting dotted strips to the back of the plaid designer series paper and adhere to the card base.

3. Create a banner from the Real Red cardstock using the Banner Punch. Randomly stamp the banner with the snowflake image inked with Real Red ink. Adhere to the card base.

4. Run the Snowflake Edging framelit through the Big Shot with Whisper White cardstock. Snip out two of the snowflakes. Save to use in the next step.

5. Create the Old Olive stitched circle from the 2-3/8″ Stitched Circle framelit. This is Circle #3 as labeled in the photograph. “Pop” up on Stampin’ Dimensionals, but before adhering, position and adhere the snowflakes from Step 4 underneath the circle as shown in the photograph.
 6. Create the label by using the Tag framelit. Place the black cardstick under the Tag framelit.

Run it through the Big Shot JUST UNTIL the “roller” on the Big Shot clears the scalloped end. Flip the cardstock 180 degrees.

Repeat to punch out the second decorated end.

7. Stamp the sentiment in VersaMark onto the label you just created and heat emboss with White Stampin’ Emboss Powder. Be sure to use the Embossing Buddy in order to avoid annoying white speckles. Adhere to the Old Olive circle.

8. Ink the “Wishing you a Season” sentiment in Basic Black. Stamp onto Whisper White cardstock, and cut out ” Wishing You” and “A Season”. Adhere to the circle above the heat embossed label.


9. Using the Fine-Top Glue Pen, adhere the wooden bow.

How Hard Was It to Crack this CASE
Layers! Heat embossing! Snipping snowflakes! A custom made label. There is a lot of time involved, and a certain level of precision is required, too! But the results are well worth the effort you will put into creating a few of these plaid beauties for those very special people on your Christmas Card List. Difficulty Level: 4 out of 5
#SUontheCASE
Nicole and I hope our projects today inspire you to try CASE-ing the catalog, too! We’ll be “on the case”, looking for the hashtag #SUontheCASE on social media (Facebook, Twitter, Instagram, Google+ & Pinterest). If we find one of your projects, we’ll share it, like it, repost it – we’ll do it all!
 Now head on over to Nicole, the Pixel Maven, to see the CASE file she has been working on from the Annual Catalog. It is amazing. Nicole always writes the BEST tutorials! You will love what she has created for you! And remember, if you have any questions about the cards I create or the techniques I use, I am only an email away. Until next time – CASE away!
Would you like to check out the most recent Cold CASE Files? Try these:
A CASE of Gourd Goodness
The CASE of the Sheltering Tree
The CASE of the Beautiful Bouquet
The CASE of the Birthday Blooms
Ready to get On this CASE? If you would like to try your hand at creating today’s card, the supply list is located below. Clicking on a product takes you right to my store.


Pingback: On the CASE: A CASE of Nature Sings - The Stampin' Schach
Oh Ann… just love the dark green plains at Christmas time! Your card is amazing…. love them both. hugs.
The hint of snowflakes with the rich colors and plaid make a fabulous card.
Bright Christmas card. Love the color scheme and placement of items. Puts one in the mood already for the festive season.
What a holiday beauty! Love the snowflakes tucked in and the wooden bow!
Wow Ann, you cracked this CASE perfectly. Your card looks beautiful, much more colorful than in the catalog photo. I did not even notice the dotted edge die in this set, love it. Thanks for the easy to follow CASE instructions.
Pingback: On the CASE: Paisleys & Posies - Pixel Mavens' Retreat