Thank You Card for Freshly Made Sketches

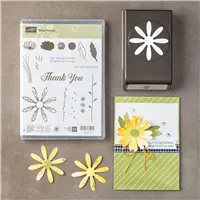
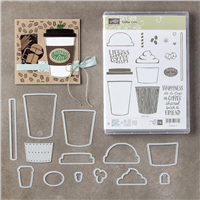
It’s great to be back! And it’s great to be featuring this thank you card, made with the new Coffee Café stamp set, for Freshly Made Sketches.
Coffee Cafe Thank You CardWe just returned from showing Jackie in Canada for three weeks, and I needed several thank you cards to send out to my new Canadian friends.  I thought Narelle’s sketch would be perfect for showcasing the adorable Coffee Café set.  It’s easy, thanks to the coordinating Coffee Cups framelits.  I hope you like this cute little thank you card a latte!

FMS 295

The Stampin’ Schach Design Tips … Thank You Card
This finished card measures 4-1/4″ wide by 5-1/2″ long.

Easy peasy are the key words to describe this thank you card. The stamping involved is a breeze.

Close Up of Cup on Thank You Card
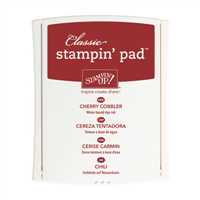
The greeting was stamped in Garden Green, the lid in Early Espresso, and the little hearts are Cherry Cobbler.  Since this was the first time I inked up this set, I rubbed over the lid and sentiment oval with a pencil eraser to help the ink adhere better, thus providing a better image.

Linen Thread Bow on Thank You Card

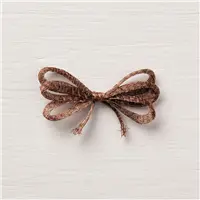
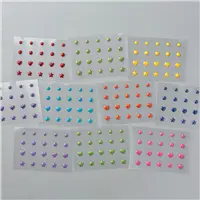
To add texture, I added a Linen Thread bow, and popped the sentiment up on a Corrugated Elements oval.  Cherry Cobbler Enamel Shapes add a “pop” of color.

Coffe Café thank you card

This card is heading to Keith, who not only opened his home up to two human and one four-legged guest, but he also introduced us to that Canadian staple…Tim Horton’s! You can’t beat the apple fritters.  Nearly every morning, we would walk the dogs the short distance to the coffee shop, and two of us would hold dogs while the third person would go in and order.  Then we would make our way to the park across from his home and enjoy our goodies.   I am sure he will understand the significance of my design. Of course, this daily routine certainly did not help my diet!

Coming Up

Over the next few days, I will be sharing my Canadian adventures with you.  Expect plenty of pictures of Jackie the Boxer, as well as Niagara Falls.  Plus, I’ll be designing more thank you cards which I’ll feature AND I will be sharing my list of retired stamp sets and framelits. Of course, as always, if you ever have any questions about the cards I create or the products I use, I am only an email away!  Until next time…

siggy-1

The Stamp Review Crew: Colorful Seasons Edition

SRC Banner

It’s time for another round of inspiration from The Stamp Review Crew.  If this is your very first visit to one of our hops, we are a group of international Stampin’ Up! demonstrators whose mission is to do a blog hop on the first and third Mondays of each month. Our hops are unique because each of us features the same stamp set used in a variety of ways. This week we are featuring the fabulous Colorful Seasons stamp set. I am Stop #1 on the hop. You may have just left Stop #15, the amazing Natalie Lapakko! After visiting me, you will continue to Stop #2, the ever-so-talented Heidi Baks, who always blows me away with her talent.  Enjoy today’s hop and my trio of cards!

Colorful Seasons Fall in Faux Silk

Colorful Seasons Fall
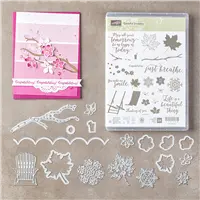
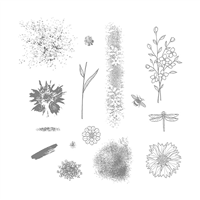
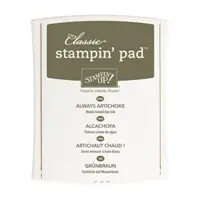
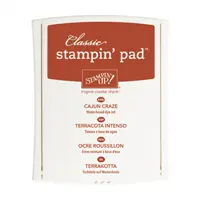
For my first card today, I decided to showcase the fall splendor of Colorful Seasons by using my favorite trio of autumnal colors: Always Artichoke, Cajun Craze, Crushed Curry.  These were accented with the warmth and elegance of Copper Foil.

Sometimes when I sit down to make a card, I forget about the arsenal of techniques we have at our disposal.  Does this ever happen to you? Luckily for me, I remembered a texture-rich technique I used to use several years ago when designing fall cards. It’s the “faux silk technique”, and it is as easy as 1-2-3.

Close up of Faux Silk

You will need a wet adhesive, such as Tombow Multipurpose Liquid Glue, card stock, and a piece of ordinary tissue paper.

  1.  Spread a thin layer of glue onto Very Vanilla card stock. Smooth using a sponge brush. No sponge brush? That’s alright! You can use a piece of scrap card stock, or even your fingers!
  2. Crumple up your piece of tissue paper, then smooth it out.
  3. Place the “crumpled-up-smoothed out” tissue paper on top of the card stock adhere, and stamp away.

Close up of Copper Foil Leaf

Two Copper Foil leaves were created with the coordinating Seasonal Layers Thinlits. New 1/4″ Copper Trim (spread out), and a bit of Copper Thread add to the delicious texture!  Speckles were created with the Touches of Texture set and Crumb Cake ink.  Pearls provide the perfect accent.

Colorful Seasons Fall card

Colorful Seasons Faux Watercolored Winter

Seasonal Layers Winter Card

Pounce!  The background for this card was created using baby wipes and inks.  I simply scrunched up a baby wipe, inked it up on my ink pad, and pounced around on the surface of the paper. I used Soft Sky, Smoky Slate, and Blushing Bride inks. Next, I added VersaMark Snowflakes and heat embossed them with Silver Stampin’ Emboss Powder.

Silver Foil snowflakes, punched out with the Seasonal Layers Thinlits and popped up on dimensionals, add depth to the card.

Close up of Seasonal Colors snowflakes

Icy sparkle is added in a number of ways, including new Silver Mini Sequins and 3/8″ Metallic-Edge Ribbon in Silver and Whisper White.

Close up of ribbon trim

Although I tend to be a “fall, pearl, warm color” kind of gal, I do love the wintery mix of colors and bling on this winter card.

Colorful Seasons Berry Burst Spring

Seasonal Colors Spring card

The “Spring” card was created earlier, but I wanted to include it here in order to demonstrate the versatility of this set. More details can be found on the original post, HERE.

Close Up of Flowers

I hope you enjoyed today’s cards made with this versatile set.  Won’t you let me know in your  comment today?  Of course, if you ever have a question about the cards I create or the techniques I use, I am only an email away.  Now hop along to Stop #2, Heidi Baks!  I guarantee you will not be disappointed with what she has in store for you!  If you get lost along the way, you can find a list of all the hoppers at The Stamp Review Crew.  Until next time…

Stamp Review Crew Next

SRC Previous Badge

siggy-1

Price: $110.00

2017-2018 Annual Catalog Is Live

2017 - 2018 Annual Catalog Cover2017-2018 Annual CatalogClick Here to view the new catalog

If you do not currently have a Stampin’ Up! demonstrator and would like your own paper copy of the 2017-2018 Annual Catalog, please email me at ann@thestampinschach.com OR kimschach@msn.com.  I will send you your very own copy!

Ready for More Rewards?

From now until June 30th, if you place an order of $350 or more, you will get $35 MORE in FREE STAMPIN’ REWARDS!   This Bonus applies to individual online orders, customer orders that I place for you, and workshop orders.

rewards table

Oh My Stars…A Treat for My June Customers

Close up of textured background

Customers who place a product order of $50 or more (before shipping and tax) in my on-line store using my HOST CODE  2UP9UAE2, will receive the NEW Oh My Stars Textured Impressions Embossing Folder FREE! This offer is only available for orders placed through my on-line store using the host code from June 1 through June 29th.   Your embossing folder will be mailed to you in mid-July.

PLEASE REMEMBER!  If your order is $150 or more (before shipping and tax), you should NOT enter the code.  I will automatically send you the Oh My Stars folder AND you will receive your own host rewards!

An easy way to reach $50 is with the Daisy Delight Bundle, with coordinating papers!  CLICK HERE to see my Daisy card with tutorial!

Stay tuned for my picks from the Annual Catalog.  I can’t wait to share those items which make my heart go pitter-pat!  And remember,  if you ever have any questions about the cards I create or the techniques I use, I am only an email away! Until next time…

siggy-1