


Summer time and the living is easy! Enjoy my favorites from July and August. To read the original post in which the card appeared, please click on the name of the card. The remainder of today’s post includes a few pictures of The Twins after their Doggie Day Spa excursion. The winner of the Butterfly Prints Blog Candy will be announced at the very end of the post.
July
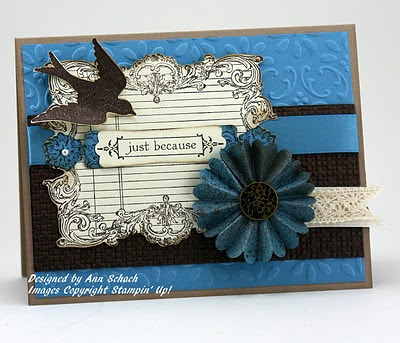
Notably Ornate
July
Notably Ornate
Yikes…I was in a hurry to get this card completed prior to leaving for Convention. I totally forgot to distress the edges! If I were to re-do this card, I would definitely get out the Sponge Daubers, Soft Suede ink, and the Color Spritzer Tool! And this what an awesome Valentine this would make simply by switching to Cherry Cobbler!
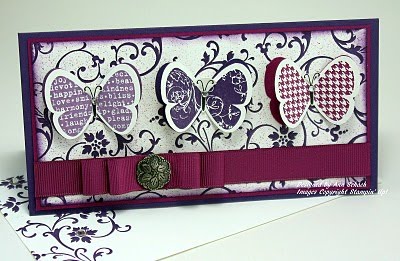
Pals Swap Card
For this Convention swap card I used Pear Pizzazz, Peach Parfait, and Blushing Bride, among other colors. I would love to re-do this card with traditional Halloween colors! Ah…there’s always next year!

August
Greeting Card Kid
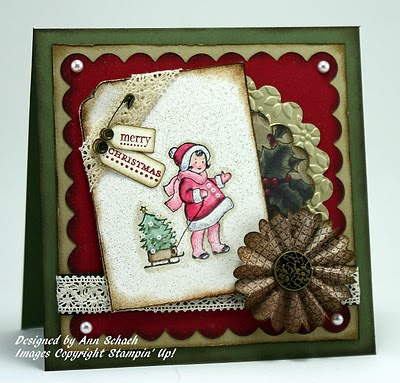
Texture, pearls, lace, antique brad, vintage trinkets, Deck the Halls! This is one card that I would not change! That’s unusual for me!
Doggie Day Spa
 Thursday was “Spa Day” for the Boxer Twins! Mom woke them up early for their trip to the Allgood Animal Clinic and their appointment with Valerie! After an Aloe and Oatmeal bath and a warming blow dry, they had a mani-pedi and their little puppy whiskers trimmed! Look how pretty Muffy’s feet look!
After such a relaxing day, Muffy could hardly keep her eyes open when she arrived back home to her favorite napping spot on the back of the couch. On her little “Groom-O-Gram”, Valerie noted “I enjoyed all the kisses Muffy gave me!”
 And look at the face on this handsome young man! At 19-1/2 weeks, Mr. Brody weighed in at 37.7 pounds. I think that Brody aspires to play professional football! He’s one big boy! On Brody’s “Groom-O-Gram”, Valerie noted that Brody was “very well behaved”. That’s Brody for you!
 He is definitely a momma’s boy!
 “And Brody…what a big tongue you have!”
 “The better to kiss you with, Mom!”
Blog Candy Winner
I would like to thank everyone who took time out of their busy holiday schedule to stop by and comment on my card. I really do appreciate your input and support. As randomly drawn, the winner of this week’s Butterfly Prints Blog Candy is:
#52
Vicki said…
Adding pearls, glitter…really any of those extra touches makes the cards special. I’m always looking to add stuff and the blog candy looks amazing. 🙂
Adding pearls, glitter…really any of those extra touches makes the cards special. I’m always looking to add stuff and the blog candy looks amazing. 🙂
Vicki, would you please email your address to me within 48 hours, and I will send out your blog candy pronto! Once again, thanks to all of you for your kind remarks! Until next time…


