Tuesday’s Weekly Deals and Jack the Boxer

It’s time for the Weekly Deals! I know what I will be stocking up on.  How about you?
Weekly Deals December 8, 2015My Weekly Deal Choices

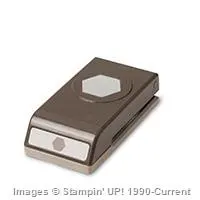
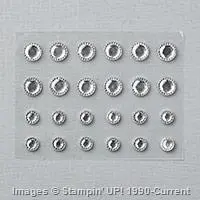
In case you were wondering what is on my order for today, I am snatching up the Iced Rhinestones and an extra Precision Base Plate to have on hand!  With weekly deals like these, I can’t resist.

Occasions Catalogs and Sale-A-Bration Brochures

If you are one of my regular customers, rejoice! The new Occasion Catalog and Sale-a-Bration brochure will be heading your way soon through Stampin’ Up!’s mailing selector service.  My name and contact information will be listed on the back. Look for them to be delivered close to the end of December.

Of course, I will always have catalogs on hand for my new customers, too!  If you currently do not have a demonstrator, just email me at: ann@thestampinschach.com.  I will make certain to add you to my list!

Jack is Back

After surgery a month ago to remove necrotic tissue from a spider bite, Jack hit the show ring…battle scars and all.  He did an awesome job, winning his first Reserve Winners Dog ribbon.  He is now off for the holidays and playtime! Here is a picture of him on his 8 month birthday at the show in Rosemont, IL.  He is pictured with “Amy the Handler”.

Jack at Rosemont

And I am back, too! It’s time to get started on my Christmas cards.  You know me…I’m always rushing around at the last minute. I’ll be sure to share my creations as I get them completed! Now that the dog shows are behind me for this year, it’s time to get back to the business of stamping!

As always, if you have any questions about the cards I create, the techniques I use, or any of our wonderful Stampin’ Up! products, I am only an email away! Until next time…
siggy-1

Jolly Christmas Founder’s Circle Card Tutorial

Happy Thanksgiving to all of you who celebrate this holiday!  I hope you are enjoying your time with family and friends.  For me, Thanksgiving has always been a time for reflection.  I have so many things for which I am thankful…and YOU are one of them.  I have met so many wonderful people through stamping and blogging.  I would love to show my gratitude by sharing the tutorial for my Founder’s Circle swap card for this year.  Enjoy!

IMG_2950Supplies:

Stamps
Jolly Christmas (139873 W, 139876  C)
Peaceful Wreath (139794 P)

Paper
Very Vanilla card stock (101650)
*4-1/4” x 11” (scored at 5-1/2” for the card base)
*3-3/4″ x 5″ (embossed layer)
* 3″ x 3″ (two pieces for deer and circle)
* 1-7/8″ x  5/8″ (sentiment)

Gold Foil (132622)
*4″ x 5-1/4″ (for mat)
*3-1/2″ x 3″ (for tree)

Ink
Soft Suede (126978)
VersaMark (102283)

Other
Big Shot (113439)
Circles Collection Framelits (130911)
Gold Cording Trim (139618)
Gold Stampin’ Emboss Powder (109129)
Heat Tool (129053)
Hexagon Punch (130919)
Paper Snips (103579)
Perfect Pines Framelits (139665)
Pearl Basic Jewels (119247)
SNAIL Adhesive (104332)
Softly Falling Textured Impressions Embossing Folder (139672)
Stampin’ Dimensionals (104430)

Instructions:
1. Score the 11” x 4-1/4” piece of Very Vanilla card stock at 5-1/2″ to create the card base.

2.  Adhere the 4″ x 5-1/4″ piece of Gold Foil to the card base, leaving a 1/8″ border on all four sides.

3. Emboss the 3-3/4″ x 5″ piece of Very Vanilla card stock using the Gently Falling Textured Impressions Embossing Folder.  Adhere on top of the Gold Foil, leaving a 1/8″ border on all four sides.

4.  Using the 2-3/8″ Circle Framelit, cut a Very Vanilla circle.  Emboss using the Gently Falling Textured Impressions Embossing Folder.

4.  Cut a Tree from Gold Foil using the largest Peaceful Pines tree framelit.  Adhere the Tree to the back of the circle using SNAIL adhesive.  Add two coils of Gold Cording as shown.  Attach all of this to the card with Stampin’ Dimensionals.

IMG_2950-004

5.  Ink the Deer image with VersaMark and stamp onto Very Vanilla card stock.  Heat emboss with Gold Stampin’ Emboss Powder.  Snip out using Paper Snips. Adhere to the circle with dimensionals.

IMG_2955

6.  Stamp the sentiment in Soft Suede.  Use the Hexagon Punch to create the “V” end.  Adhere to the card with dimensionals.

IMG_2950-002

7.  Add Pearls to the tree and sentiment as shown.

I hope you enjoyed today’s tutorial, and that you will give this card a try! Of course, if you need to order any of the supplies,  please CLICK HERE.  And remember, if you have any questions about the cards I create or the techniques I use, I am only an email away!  Until next time…

siggy-1

A Bit of Glimmer for The Paper Players

IMG_3030My dear friends at The Paper Players are hosting a sketch challenge this week.  Luckily for me, I was able to work in a little stamping time and play along with them.  I hope you enjoy today’s sparkly card!

pp272_AThe Stampin’ Schach Design Tips
This finished card measures 5-1/2″ x  4-1/4″ when folded.

  • Tag!  The wooden Snowflake Element, with its Iced Rhinestone center really sets off this tag.  The Black Glimmer paper bow adds an elegant touch of sparkle, resulting in a formal “black tie” look.

IMG_3030-007

  • Black and gold! Taking my cue from the Winter Wonderland Specialty Designer Series Paper, the background for this card is created from Gold Foil and Black Glimmer papers.  The Gently Falling Textured Impressions Embossing Folder adds texture.

IMG_3030-005

  • A simple sentiment! With so many details already in play, I though a simple sentiment was appropriate.  Stampin’ Up!’s archival Basic Black ink delivers such a crisp image.

IMG_3030-009I hope you enjoyed today’s card.  I really have to get in gear and start stamping my holiday cards.  I’m taking my cue from one of you! I’ve decided to stamp a few of several designs, instead of making them all the same.  There are some adorable cards in the Holiday Catalog that I would love to CASE! How about you?  As always, if you ever have any questions about the cards I create or the techniques I use, I am only an email away.  Until next time…
siggy-1