![]()
Welcome to this week’s On the CASE with Ann & Nicole, an endeavor undertaken with my friend and stamping buddy, Nicole Watt, of Pixel Maven’s Retreat. In “case” this is your first “On the CASE” visit, here is the scoop: Twice a month, on the first and third Wednesdays, we will be CASEing a card from one of Stampin’ Up!’s current catalogs. CASE means to Copy and Share with Everyone, and that is exactly what we will be doing. We hope you enjoy the cards we CASE and the free step-by-step tutorials included in our posts! Let’s get on to today’s CASE: The CASE of A Brightly Lit Christmas!
The CASE of a Brightly Lit Christmas
Page 29 – Holiday Catalog 2017


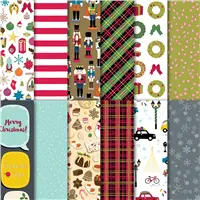
It was the Christmas Around the World paper and embellishments, and the above display of adorable items, which sold me on the Brightly Lit Christmas Bundle. As an added bonus, all of the cutie patootie cards and boxes are SO easy to make. Because I am mad about plaid, I just had to CASE the adorable card with the fussy cut car. I seriously felt guilty that this card was completed in such a short amount of time. You’ll see just how easy it was to create in today’s step-by-step tutorial. Let’s get on the CASE!

Colors of the Day
Stamps and Papers and Inks … Oh, My!
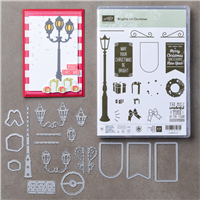
Stamps: Brightly Lit Christmas
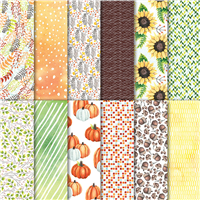
Paper: Crumb Cake Cardstock (5-1/2″ x 8-1/2″, 3-3/4″ x 2-1/8″), Garden Green Cardstock (3-3/8″ x 2-1/4″), Whisper White Cardstock (1-1/2″ x 2-1/2″), Christmas Around the World Designer Series Paper (5-1/4″ x 4″, scrap with red car), Silver Foil (scrap)
Inks: Old Olive, Versamark Watermark Ink
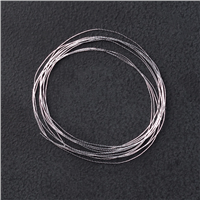
Other: Big Shot, Christmas Lamppost Thinlits, Paper Snips, Year of Cheer Specialty Washi Tape, Real Red 1/8″ Solid Ribbon, Silver Metallic Thread, SNAIL Adhesive, Stampin’ Dimensionals, Fine-Tip Glue Pen, Mini Glue Dots
“On the CASE” Notes
Your Step-by-Step Guide
1. Score the Crumb Cake cardstock at 4-1/4″ to create the card base. Adhere the Plaid Designer Series Paper to the card base.

2. Using Stampin’ Dimensionals, adhere the smaller piece of Crumb Cake cardstock to the card.

3. Using Versamark ink, randomly stamp the snow image on the Garden Green cardstock.

4. Add a strip of Silver Year of Cheer Specialty Washi Tape at the top and and a strip at the bottom of the Garden Green cardstock.

5. Add the Garden Green cardstock atop the Crumb Cake piece, once again using dimensionals.

6. Ink the sentiment in Old Olive, stamp onto Whisper White cardstock, and die cut out using the banner thinlit.

7. Use silver foil and the scroll thinlit to create the banner holder.

8. Use a Fine-Tip Glue Pen to glue the banner holder to the banner.

9. Add silver metallic thread to the back of the banner.

10. Adhere to the card using dimensionals.

11. Snip out a car from the Christmas Around the World Designer Series Paper.

12. Adhere to the card with dimensionals.

13. As a finishing touch, add a 1/8″ Real Red Ribbon, as shown.

14. Enjoy!

How Hard Was It to Crack this CASE
What can I say? This card is quick, easy and cute! There are a few steps involved, but they are definitely easy…even the fussy cutting! Difficulty Level: 2 out of 5
#SUontheCASE
Nicole and I hope our projects today inspire you to try CASE-ing the catalog, too! We’ll be “on the case”, looking for the hashtag #SUontheCASE on social media (Facebook, Twitter, Instagram, Google+ & Pinterest). If we find one of your projects, we’ll share it, like it, repost it – we’ll do it all!

Now head on over to Nicole, the Pixel Maven, to see the CASE file she has been working on from the Annual Catalog. Nicole always writes the BEST tutorials! You will love what she has created for you! And remember, if you have any questions about the cards I create or the techniques I use, I am only an email away. Until next time – CASE away!
Would you like to check out the most recent Cold CASE Files? Try these:
A CASE of Good Tidings
A CASE of Nature Sings
A CASE of Snowflake Sentiments
A CASE of Gourd Goodness
The CASE of the Sheltering Tree
The CASE of the Beautiful Bouquet
The CASE of the Birthday Blooms
Ready to get On this CASE? If you would like to try your hand at creating your own CASE of A Brightly Lit Christmas, the supply list is located below. Clicking on a product takes you right to my store.


 I love fall! I love pumpkins! I love stamping! So what could be better than stamping a fall card featuring pumpkins? There is an idiom which states “Less is more”. Well, that certainly is not the case with this card. To say I got carried away with layers and details is an understatement. Let’s take a closer look at today’s card!
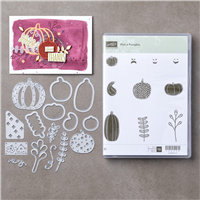
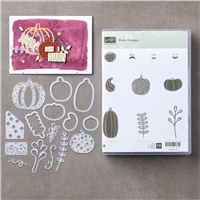
 This pumpkin was selectively inked using Cajun Craze, Crushed Curry and Crumb Cake. The upper portion was embossed using a mixture of clear embossing powder and Dazzling Diamonds glitter. Tip: A little glitter goes a long way! The Garden Green vine, die cut from the Patterned Pumpkins Thinlits, was embossed with a touch of Copper Stampin’ Emboss Powder.
 With this pumpkin, a mixture of Clear Stampin’ Emboss Powder and Dazzling Diamonds Stampin’ Glitter once again adds the sparkle, while Copper Stampin’ Emboss Powder is responsible for the rich metallic shine.
 The same technique was used on these two pumpkins, while the gourd merely sports a pearl. I know. I know. I should have made the gourd a different color. Can you believe that all this time I was thinking eggplant – and a rather warty one at that? It wasn’t until I was done photographing the card that I realized the error of my botanical ways. How much prettier it would have been in a vanilla color. Do these things ever happen to you?
 A variety of foliage was created from Soft Sky and Very Vanilla cardstock, as well as Copper Foil. Of course, I just had to add a few pearls! The lovely sentiment is from the Painted Harvest stamp set.
 I hope you enjoyed today’s card made with the Pick a Pumpkin set. Won’t you let me know in your comment today? Of course, if you ever have a question about the cards I create or the techniques I use, I am only an email away. Now hop along to