


It’s time for the Stamp Review Crew: Dashing Deer Edition! If this is your very first visit to one of our hops, the Stamp Review Crew is a group of international Stampin’ Up! demonstrators whose mission is to do a blog hop on the first, third and fifth Mondays of each month. Our hops are unique because each of us features the same stamp set used in a variety of ways, giving you loads of inspiration for that set. The hops are archived at the Stamp Review Crew blog. You will be able to click through each hop at any time, going directly to the posts for that hop whenever you want.
This week we are featuring the Dashing Deer bundle. If you are following along in order, you have just arrived from the amazing Heidi Baks. After visiting me, you will continue to the next stop, the talented Holly Krautkremer. Be prepared to be inspired!
Dashing Deer – Bag, Tag and Card

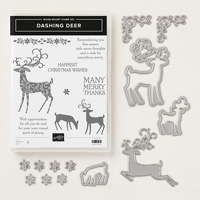
I LOVE the Dashing Deer bundle. The coordinating Detailed Deer thinlits are so elegant. The leaping deer thinlit is one of my favorites, reminding me a wee bit of the Art Deco style gazelles that I absolutely adore. I used this thinlit to design a gift tag and matching card. Because they are SO easy to make, I am including a step-by-step tutorial so you can create your own.
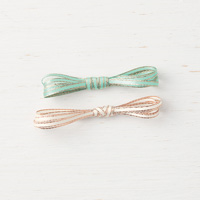
Colors of the Day
Dashing Deer Card

Stamps and Papers and Inks … Oh, My!
Stamps: Dashing Deer Bundle – includes Detailed Deer Thinlits
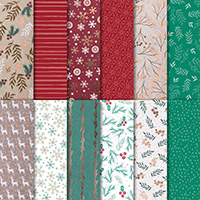
Paper: Sahara Sand cardstock (4-1/4” x 11”), Whisper White cardstock (4” x 5-1/4”, 3” x 4”, 2-5/8” x 3/4”), Copper Foil (3” x 4”), Joyous Noel Specialty Designer Series Paper (3-3/4” x 5”)
Ink: Versamark
Other: Big Shot, Softly Falling Textured Impressions Embossing Folder, Heat Tool, Copper Embossing Powder, Stampin’ Dimensionals, SNAIL Permanent Adhesive
Your Step-by-Step Guide
- Score the Sahara Sand cardstock at 5-1/2” to form the card base.
- Mat the designer paper onto the Whisper White cardstock and adhere to the card base.
- Carefully position the deer thinlit in the middle of the copper foil. Angle it so it appears as if it is leaping. Die cut out. Use the negative piece for the card, and save the deer to create the tag.
- Emboss the Whisper White cardstock with the embossing folder. Adhere to the back of the foil panel with dimensionals, then adhere this piece to the card base with dimensionals.
- Heat emboss the sentiment with copper embossing folder. Snip the ends to form a banner. Adhere to the card with dimensionals.
Dashing Deer Gift Bag and Tag

Stamps and Papers and Inks … Oh, My!
Stamps: Dashing Deer Bundle – includes Detailed Deer Thinlits
Paper: Sahara Sand cardstock (8-1/2” x 3/4”), Whisper White cardstock (3-1/2” x 3-1/2”), Copper Foil (2 strips – 3-5/8” x 1”, 3-1/2” x 3-1/2”, 3” x 4”), Joyous Noel Specialty Designer Series Paper (12” x 6-1/2”)
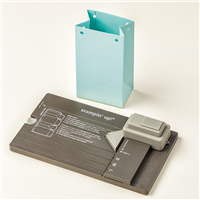
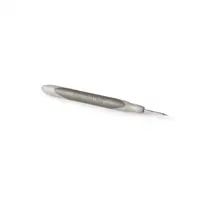
Other: Big Shot, Layering Circles Framelits Dies, Softly Falling Textured Impressions Embossing Folder, Gift Bag Punch Board, Paper-Piercing Tool, Tea Room Ribbon Combo Pack, Metallic Brads, Stampin’ Dimensionals, SNAIL Permanent Adhesive, Tear and Tape Adhesive
Your Step-by-Step Guide
- Follow the directions on the Gift Tag Punch Board to create a large gift bag.
- Attach the Sahara Sand handle using small copper brads. Make certain the heads of the brads are on the inside of the bag. Cover the prongs by adhering Copper Foil strips on the front and back of the bag.
- Die cut a 2-5/8” Whisper White circle. Emboss with the Softly Falling embossing folder. Adhere to the corresponding scallop circle cut from copper foil. Poke a hole at the top, and add a snippet of Very Vanilla/Copper ribbon.
- Adhere the deer you created from making the card to the tag with dimensionals. Tie the tag to the bag.
I hope you enjoyed today’s card. If would like to try your hand at creating your own Dashing Deer bag, tag and card, the supply list is located below. Clicking on a product takes you right to my store. Place an order of $75 or more (before tax and shipping) AND use the Host Code below to receive a little somethin’-somethin’ from me. If your order is $150 or more, please do not use the Host Code. You will automatically receive the gift from me, as well as your own Host Rewards.

October: YMF93SAZ
Of course, if you ever have a question about the cards I create or the techniques I use, I am only an email away. Now hop along to Holly to see what she has in store for you! If you get lost along the way, you can find a list of all the hoppers at The Stamp Review Crew. Until next time…


- Are you in search of a specific retired stamp set? I just might have it on my list of Retired Sets for Sale.
- If you are in need of a Holiday Catalog or an Annual Catalog, and you do not have a demonstrator, please email me (ann@thestampinschach) and I will drop one in the mail to you! I would love to be your demonstrator.


WOWzier love these but really love that gift bag it is a stunner!
I just love the clever way you used both images from die cutting the paper. Just shows it doesn’t have to be hidden under a layer after cutting. Very pretty project.
So elegant Ann. I love a 2 for 1 idea! Gorgeous!
So elegant and lovely! That gift bag is wow!!
Stunning set, Ann; love your use of the die cut and foil!!
Well that’s getting your money’s worth on that square of Gold Foil and a matching set to boot. Beautiful Ann.
Stunning with a tag, bag and card to boot! Talk about tying up the perfect package! The darn DSP is on back order so I will have to wait to CASE your projects. Loving the use of the negative deer as well. Great ideas that are just stunning! Love the tip of hiding the brad prongs with the foil paper on the bag.
Absolutely stunning, Ann! A great idea for using the positive and the negative for the deer.
Such an elegant set, Ann. Love your choice of DSP and colour scheme for the gift bag, tag and card.
Your projects using this bundle are just great! I too woukd love the instructions for your lovely bag ( great tag as well!)
Lovely set! Could you post the scoring for the bag? Thanks.
Wow, a tag and card out of the same cut! How awesome! I am for sure going to CASe this Ann. Fabulous.